More Pictures from Cathedral Rock

Our awesome climb leader Brett sent out a few more pictures from Sunday’s Cathedral Rock climb. I think we (the climbers and the mountains) look great!

13521873_1343553005659557_8691509764537827045_n

13521873_1343553092326215_1333669026009648746_n

13508871_1343553308992860_4229381274296752317_n

13438914_1343553238992867_913980977413975732_n

And finally, I’ve also uploaded two videos to YouTube: one on the summit, one of the rappel down.

Share
Posted in Pictures | Leave a comment

Print This Post Print This Post  

On the Summit of Cathedral Rock

On Sunday, June 26, three other Mountaineers and I climbed Cathedral Rock. It was a perfect day: almost no clouds, a slight breeze that kept the bugs away, a few spots with cooling snow, and dry rock to climb on. There was a lot of loose rock, though, and I was at times kicking rocks down. We managed the rock fall risk by either scrambling really close together, so that a rock wouldn’t have time to pick up speed before it hit someone, or going one at a time.

From the summit, we could see the neighboring Mount Daniel, but also Mount Rainier, Mount Shuksan, and Glacier Peak (along with tons of other peaks).

Share
Posted in Pictures | Leave a comment

Print This Post Print This Post  

So Close to Pinnacle Peak

On June 18, I joined a group of Olympia and Tacoma Mountaineers on a climb to Pinnacle Peak and The Castle.

Unfortunately, it had rained quite a bit the day before and it was still drizzling when we got there. We got to within a few dozen feet of the summit of Pinnacle, but decided to turn around. That decision was almost immediately validated as correct, as frozen rain and hail swept in.

We didn’t reach our summits, but it was still a great day in the mountains.

Share
Posted in Pictures | 1 Comment

Print This Post Print This Post  

Unicorn Peak Climb

On June 1, Jenny and I summited Unicorn Peak in the Tatoosh range, just south of Mount Rainier. I had been particularly excited about this climb, because the Bench Lake/Snow Lake hike had been my first hike in Washington state, and aside from Mt. Si, it’s probably also the one I’ve done most often. I’ve looked up towards Unicorn Peak so many times, I just had to climb it.

We had the perfect day in the mountains. The snow started between the ridges, before we got to Snow Lake. It was a steep but relatively easy ascent up the gully and the snowfield. From the col to the west of Unicorn Peak, we could see the ever-present Mount Rainier, but also Mount St. Helens, Mount Hood, and Mount Adams. A four volcano spot! It was cool to see Mount St. Helens, since we had just summited it three days earlier.

We climbed across a small moat from the snow onto rock and made a relatively simple single-pitch ascent from the south. The rappel, also on the south side, was a bit weird, since the fall line carried us a bit far to the west, but it was still easy and enjoyable.

It was a great day with great people.

Share
Posted in Pictures | Leave a comment

Print This Post Print This Post  

Mount St. Helens via Winter Route

On May 29, Jenny and I climbed Mount St. Helens. This was the second time for me, after summiting in September 2013 via the Monitor Ridge route.

This time, we took the winter route, which is a few miles longer and follows the Wormflows to the east of the Monitor Ridge route, only to join the summer route a few hundred feet from the summit. The summer route had been opened just two days before, but we still wanted to use the winter route, and that was a great decision: While there were a bunch of hikers on the summer route, we saw only two skiers all day on the winter route

The visibility wasn’t as good as 2.5 years ago — Mount Hood was a constant companion, Mount Rainier was visible from the summit, though Mount Adams only peeked through the clouds occasionally — but the snow was beautiful. On the way down, we were able to glissade for about 3000 vertical feet. Epic.

IMG_2885_20160531_122337

IMG_2890_20160531_122337

On the way to our camp site on Saturday, we also visited the Johnson Ridge Observatory and the Ape Cave, a 2-mile lava tube. Both are well worth the visit.

Share
Posted in Pictures | Leave a comment

Print This Post Print This Post  

Mountaineers Field Trip to Whistler Mountain

In mid-April, my Mountaineers SIG went on a snow overnight field trip to Rainy Pass on the North Cascades highway. We summited Whistler Mountain, learned more about snow travel, built snow anchors and practiced crevasse rescue.

On the second day, I started having problems with my eyes, unfortunately, and two instructors had to walk me down the mountain. A slightly sad end to an otherwise perfect field trip.

13246213_1312792608735597_1093625378486899495_o

13248513_1312792952068896_8619110780143003229_o

12322608_1312792748735583_1289744288197721079_o

13227646_1312792618735596_834155231057685786_o

This, though, is one of my favorite pictures:

Share
Posted in Pictures | Leave a comment

Print This Post Print This Post  

A Few More Photos from The Tooth Climb

Here are a few more pictures from our The Tooth climb taken by Brett, one of our fearless leaders.

13119843_1304309086250616_2135436237163923646_o-by-Brett

13173441_1304309392917252_6789281611691965977_o-by-Brett

13131571_1304310009583857_6729161198409330049_o-by-Brett

Share
Posted in Pictures | Leave a comment

Print This Post Print This Post  

First Multi-Pitch Alpine Rock Climb

Yesterday, my Mountaineers SIG (small instructional group) climbed to the summit of The Tooth, a granite peak near Alpental, just south of Source Lake.

This was my first multi-pitch alpine rock climb. The approach was harder than I thought, but the actual climbing was easier. Granted, it was only 5.4, but it is way more nerve-wracking when you’re several pitches up than on a crag or climbing wall.

The approach took us from the trailhead at about 3100 feet elevation to the base of The Tooth at 5300 feet. From there, it was four pitches up to 5604 feet. The first and second were long vertical rock climbing pitches with two or three pieces of protection. The third was a scrambling portion, and the last pitch was another short but steep rock climb with two fixed pieces and another placed piece of protection. We descended using four rappels and a short down-climb where we had scrambled up earlier.

I’m sore, but happy. This was an incredible day.

mountaineers-afct-the-tooth-2016-05-02-by-Vicky-2_resize

mountaineers-afct-the-tooth-2016-05-02-by-Vicky-1_resize

mountaineers-afct-the-tooth-2016-05-02_resize

Share
Posted in Pictures | Leave a comment

Print This Post Print This Post  

Rock Climbing in Vantage

With the Mountaineers, I went on my first rock climbing trip. We climbed some of the crag columns in Vantage.

Along with several others, I climbed Shake It Don’t Break It (5.5), Feather in My Cap (5.6), and Ruffled Feathers (5.7).

I can’t wait to go back.

20160423_140255

20160423_090402_resize

20160423_113327_resize

20160423_132416_resize

20160423_155057_resize

Share
Posted in Pictures | Leave a comment

Print This Post Print This Post  

Mountaineers Basic Alpine Climbing Course

Jenny and I joined the Mountaineers Basic Alpine Climbing Course this year. It’s really a rush and a lot of fun to learn so many new things: knots, belaying, climbing, rappelling, crevasse rescue.

Here’s a picture of my SIG (small instructional group) practicing multi-pitch climbing, belaying, and rappelling:

20160328_192921r

And here I (yellow pants) just climbed up and am tying into the anchor at the top:

IMG_2318_20160319_164702

Two pictures of me rappelling down (orange jacket first picture, yellow pants second picture):

IMG_2237_20160213_173904

IMG_2319_20160319_164702

Jenny is always so calm and collected, and super strong:

20160319_140703r

20160113_203332r

20160319_124320r

Share
Posted in Pictures | Leave a comment

Print This Post Print This Post  

Mt. Si Conditioning Hikes

I’ve been conditioning at Mt. Si this winter and made the hike several times.

  • December 29, 2015: 2 hours, 3 minutes
  • January 9, 2016: 2 hours, 7 minutes with heavier pack
  • March 6, 2016: 1 hour, 47 minutes with heavier pack
  • March 27, 2016: 1 hour, 45 minutes with Mountaineers training-weight pack!
  • April 3, 2016, 1 hour, 40 minutes with Mountaineers training-weight pack!

I feel good.

20151229_111328r

20160109_112935r

20160306_084744r

IMG_2357_20160327_205518r

IMG_20160403_094819-1r

Share
Posted in Pictures | Leave a comment

Print This Post Print This Post  

Hiked to Camp Muir… Again

My wonderful girlfriend was out of town, and the weather looked decent, so what could I do? Go hiking again. I would have done the same with her here (and gone together with her), but just because she’s not here doesn’t mean I can’t go, right?

I hiked to Camp Muir again. I was craving the thin air at 10,000 feet. The forecast called for freezing temperatures, pretty strong winds and a 30% chance of snow flurries at 11 AM or later, so I left home quite early, around 5:30 AM and had my boots on the trail a little after 8 AM.

At first, I was perhaps a bit slower than a few weeks ago, but I was at Pebble Creek at 9:15 AM. I made it to Camp Muir just before noon. I was wearing my new mountaineering boots for only the second time, and the first time, when I hiked up Mt. Si in them, they tore up my ankles. This time, I put a large waterproof bandage on my ankles, then a large patch of moleskin, and I taped all that together with medical tape around the heel and ankle. I also wore a thinner sock as liner and a thicker sock for insulation and cushioning.

It worked — my blisters didn’t get worse. Wearing the mountaineering boots allowed me to use my crampons. Wow, it was so much easier to get up the snow field in crampons. But on the other hand, it was also below freezing, and the snow field wasn’t melting anymore. All crevasses that I tested had frozen over and were solid. So maybe it would have been about as easy just with my regular hiking boots and without crampons as well.

I was somewhere around 9000 ft at 11 AM, and the winds had really picked up for the last half hour. At times, it was close to a white-out. I told myself I’d go to 9000 ft and then descend, but when I was there and ready to turn around, the weather improved markedly. I decided to continue another 1000 feet to Camp Muir.

Up there, it was really cold and windy this time. I took my glove off to take some pictures, and I had planned to check my blood oxygen saturation using a pulse oximeter, but it was too cold to continue to keep my glove off. I shoved a protein bar in my mouth and started the descent. On the way down, maybe to around 9500 ft, the weather was pretty bad. Near white-out again. But fortunately, I had a pretty good idea of where I needed to go, even without a map (I had given my paper map to another hiker who didn’t have one, and it was too cold to take my phone out). After that, the weather improved again and it was an easy way down the snow field.

When I got to the rocky part around 8000 ft, though, my heels started hurting quite badly. I don’t know if it’s the fat cushion or maybe the plantar fascia, or if maybe I had laced my boots too tight to avoid the heel slippage that had given me the bad blisters before. But my descent on the loose rocks was painful and slow. It got a bit better once I was past Pebble Creek again, but I wasn’t the fastest by any means. I was down at the car at 3 PM.

And when I was walking around with my backpack, helmet, ice axe, mountaineering boots, puffy, and gloves, being only the second person coming down from Camp Muir that day, I felt like a baller around the hoohas at the visitor center.

Windy, with snow flurries, on the way up to Camp Muir.

Windy, with snow flurries, on the way up to Camp Muir.

At Camp Muir in below freezing weather. The wind was blistering cold. I know, the hood goes over the helmet, but it was too cold to adjust it at 9000 ft.

At Camp Muir in below freezing weather. The wind was blistering cold. I know, the hood goes over the helmet, but it was too cold to adjust it at 9000 ft.

So, what have I learned?

  • Getting to Camp Muir when it freezes is easier than when it melts.
  • If I tape up my ankles well, they last well over 8 miles in my La Sportiva Batura 2.0 GTX mountaineering boots.
  • But after some time, the bottom of my heels start to hurt.
  • Mountaineering boots and crampons on snow or ice: wonderful.
  • Mountaineering boots and crampons on rocks: awful.
  • Mountaineering boots on rocks: still bad.
    • I don’t have very good balance in them. Because the soles don’t bend at all, my foot is basically flat on the surface of the rock, and my leg goes with it.
  • Mountaineering boots are a lot rougher on my knee when on rocks.
    • Because of the stiff sole, I can’t really ensure that I don’t pronate or roll my knee inward. If a rock I step on is lower in my middle and higher on the outside, my knee will rotate inward. This is bad and worrisome.
    • Should I put Superfeet Green insoles in my mountaineering boots? Those are the insoles I use to work against pronation in a lot of my other shoes. Or maybe Superfeet RedHot? Seems similar to the Green.
  • Even when I’m wearing gloves, I need to tape up my middle finger to avoid getting blisters from the ice axe.
  • It definitely helps to chug 1.5 liters of water when still at the car. No dehydration this time.
  • I also had a Nalgene bottle with me, and that was good, because there were brief moments when my Camelbak line froze.
    • I’ve had that happen before, but it still always surprises me.
  • I like the Premier Protein bars, especially the dark chocolate mint one, but they freeze close to solid.
    • I know, I should stick them in an interior chest pocket.
    • But they last a long time for me. Today, I had two bars during 7 hours of hiking, and that was enough to get me from 5 AM breakfast to 5 PM, when I had a nut bar in the car. During two days in the Enchantments, I had two servings of freeze-dried lasagna and four or five bars.
  • For freezing temperatures, I need thicker gloves than the rappelling gloves.
  • I should set up my hard shell’s hood to the correct helmet size before I absolutely need it.
  • But I really like a lot of the equipment that I have: the Arcteryx Alpha FL jacket is probably the best jacket I’ve ever had. Wind-resistant and breathable. A joy to be in.
  • The cheap Paradox merino blend base layer that I picked up at Costco works really well. Keeps me warm and dry. I already noticed that in the Enchantments.
  • I need to somehow tuck in my pant legs when I’m wearing crampons.
  • I don’t like skiers in the national park.

Now I’m soaking in the tub with a big bowl of chicken soup, fortified with black beans and lots of hot sauce.

Share
Posted in Pictures | Leave a comment

Print This Post Print This Post  

Camp Muir!

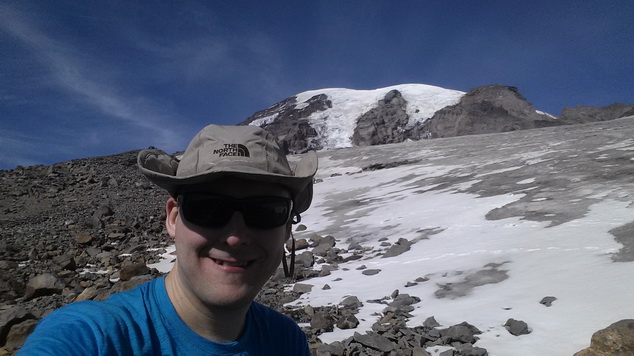
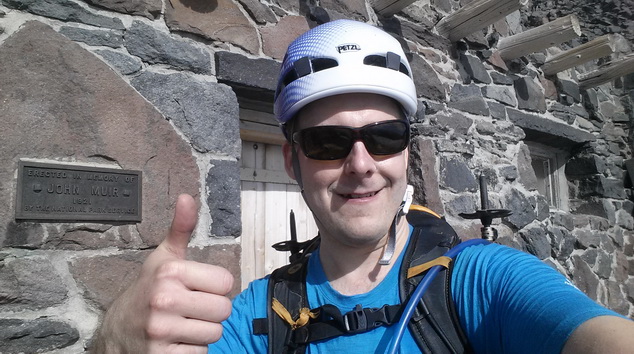
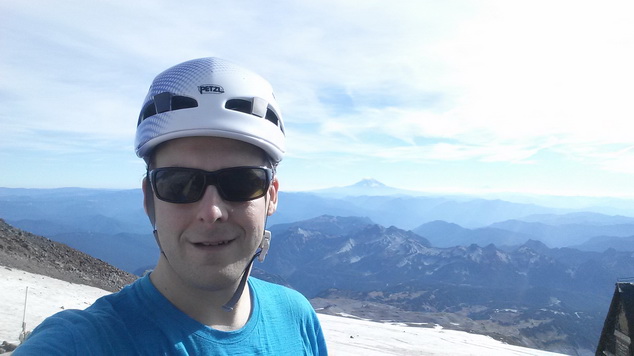
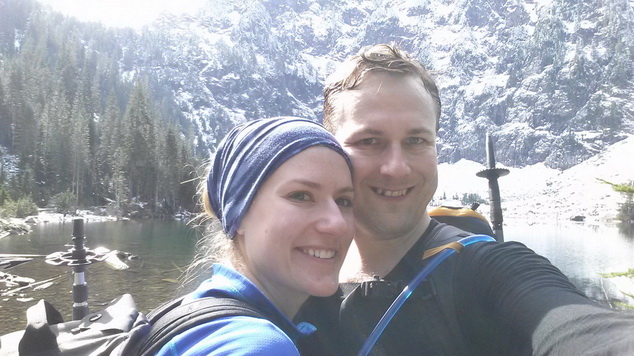
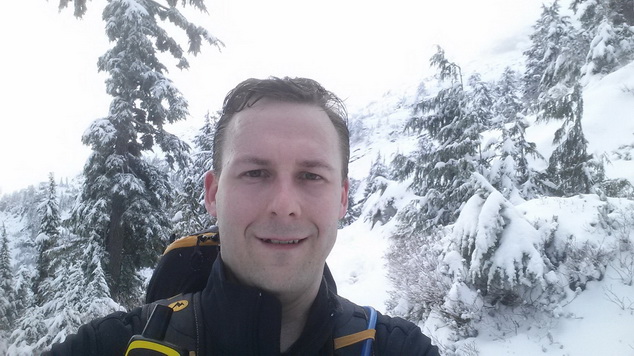
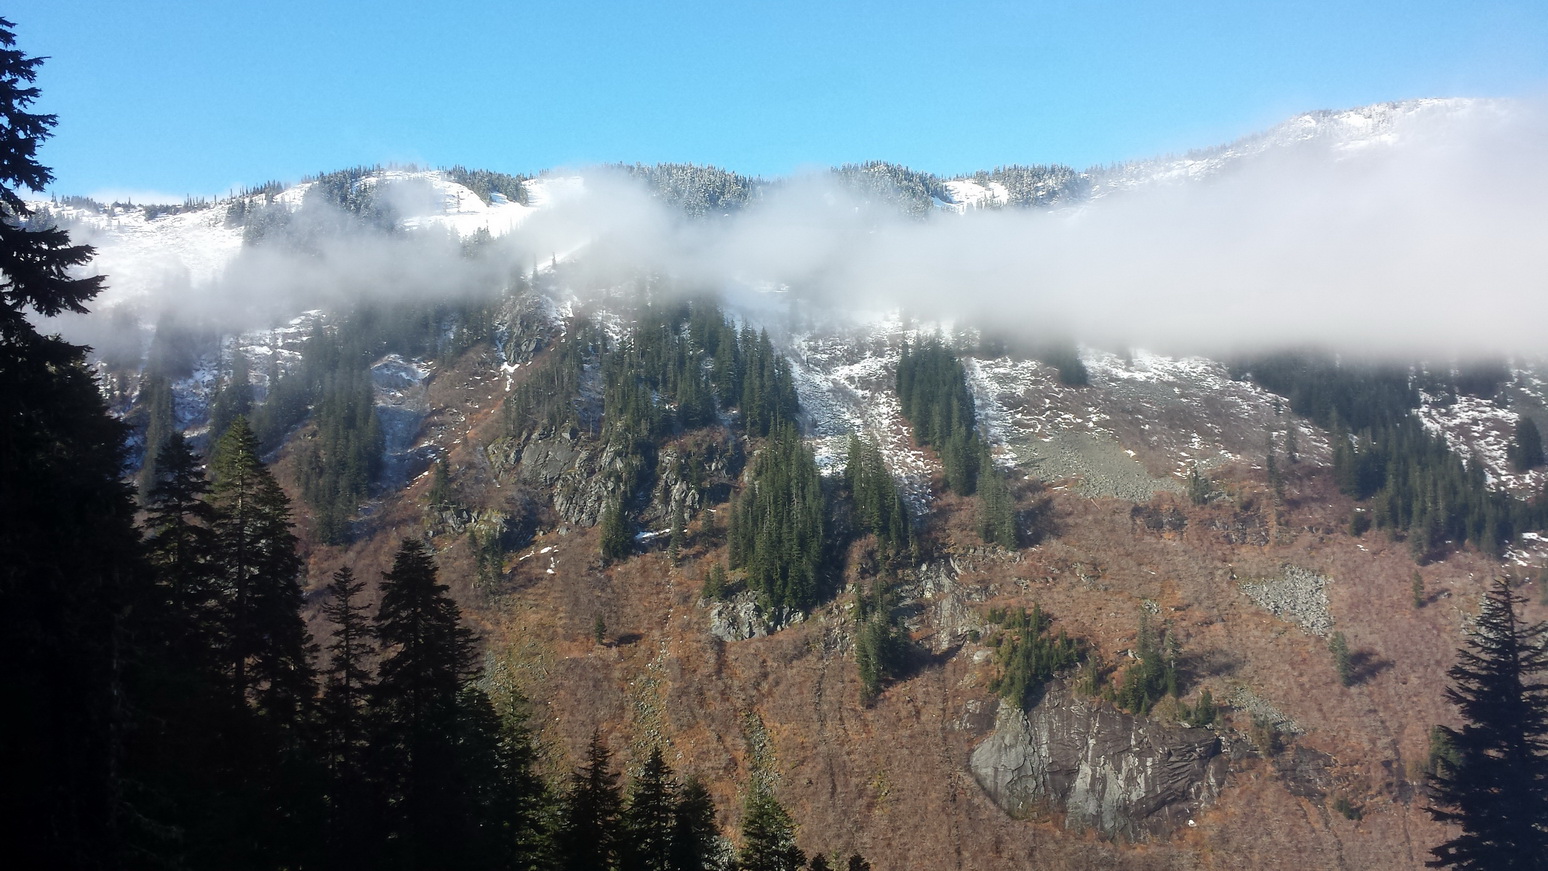
I hiked to Camp Muir at 10,000 feet on Mt. Rainier today! It was an amazing day.

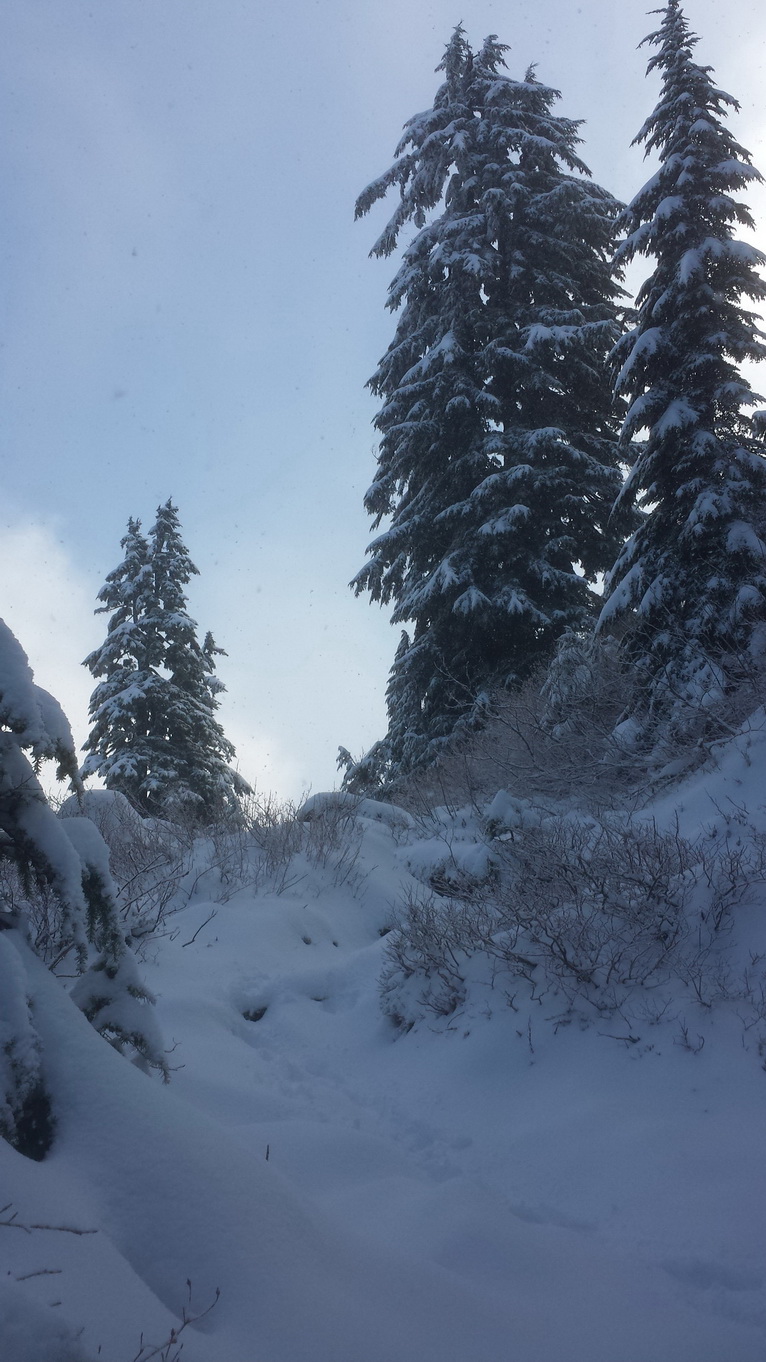
I arrived at the Paradise Visitor Center a little before 10 AM, and it took me 4.5 hours up and 3 hours down. At the beginning I was quite fast, within an hour I was already past the High Skyline Trail headed towards Pebbel Creek. Another hour later I was at 8,000 feet and had passed the spot where I had taken an RMI mountaineering day school.

20151005_121918_resize

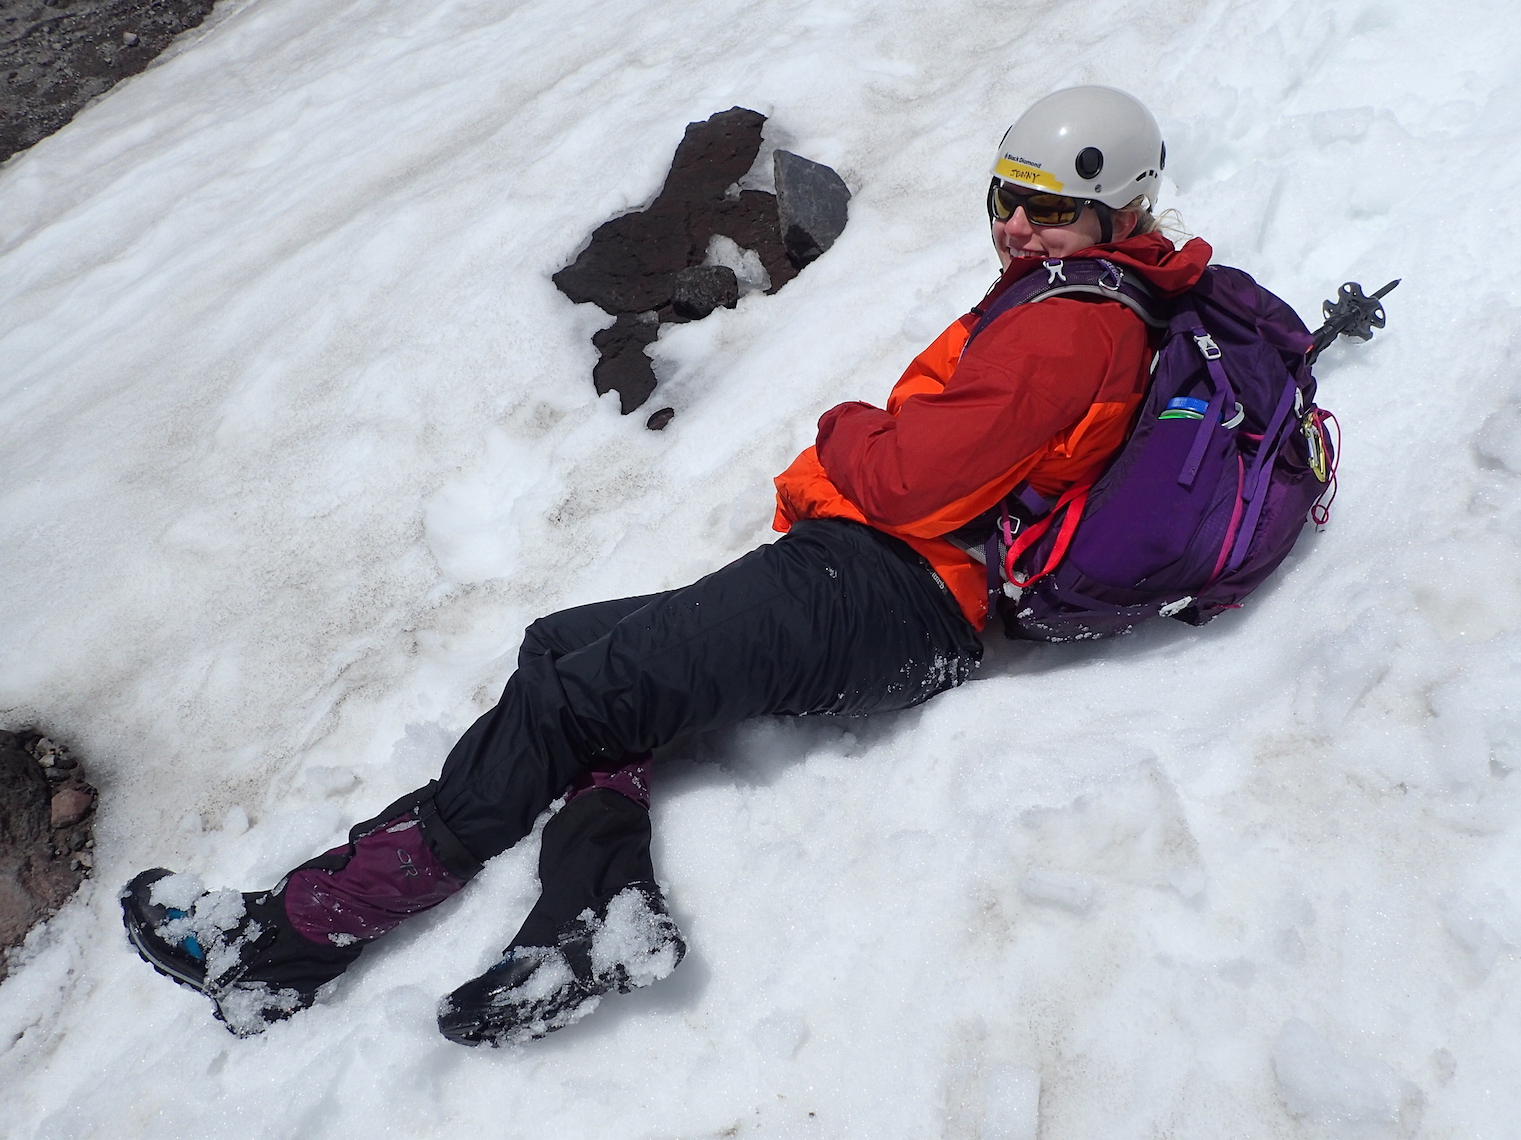
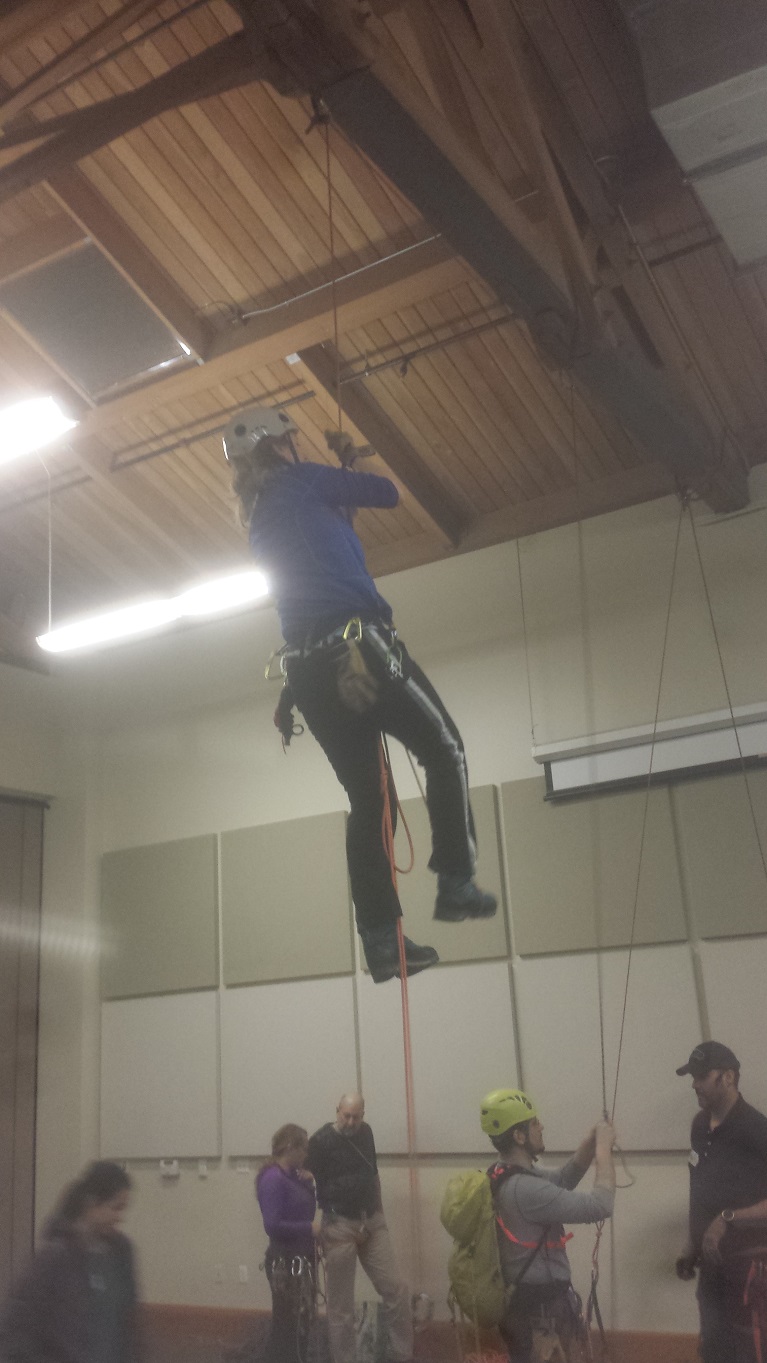
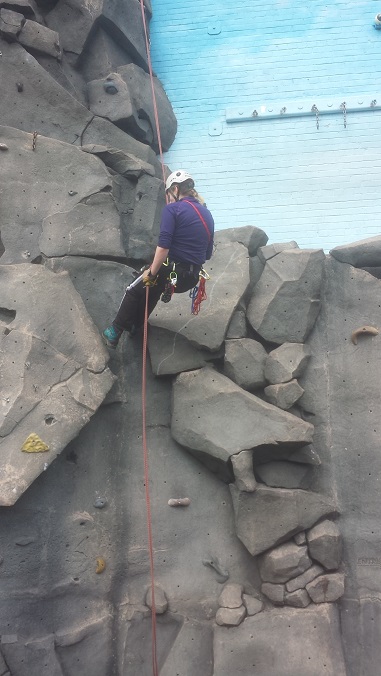
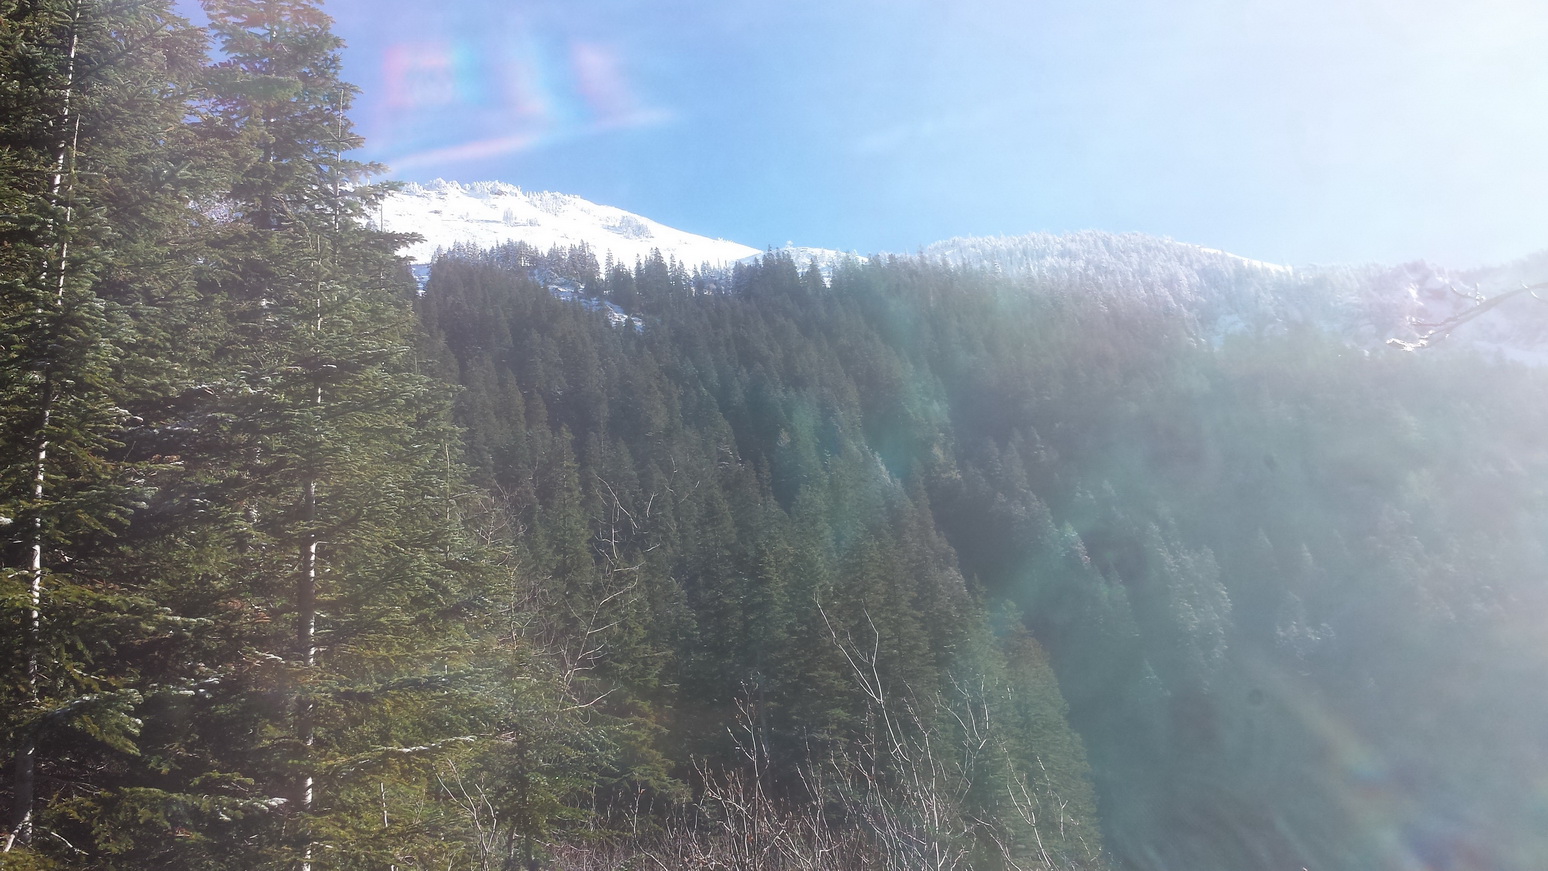
But from that point on, it got difficult. In the third hour, I didn’t quite make it to 9,000 feet. It was just too steep and slippery on the ice. And because my new mountaineering boots had torn up my heels two weeks ago, I was only wearing my regular hiking boots. And my crampons don’t fit on those. Once I slipped and had to self-arrest, just like I had learned it at the mountaineering day school.

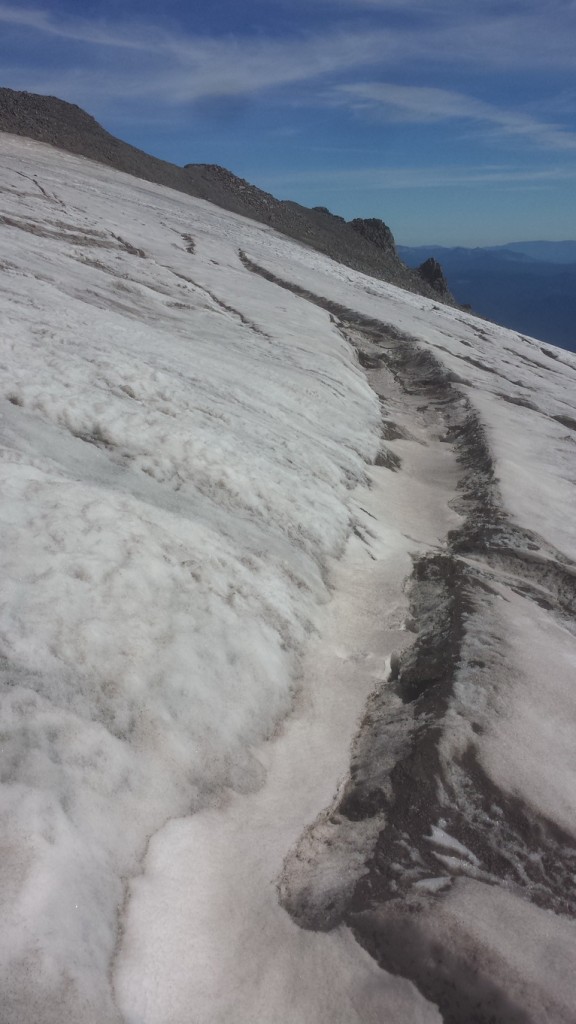
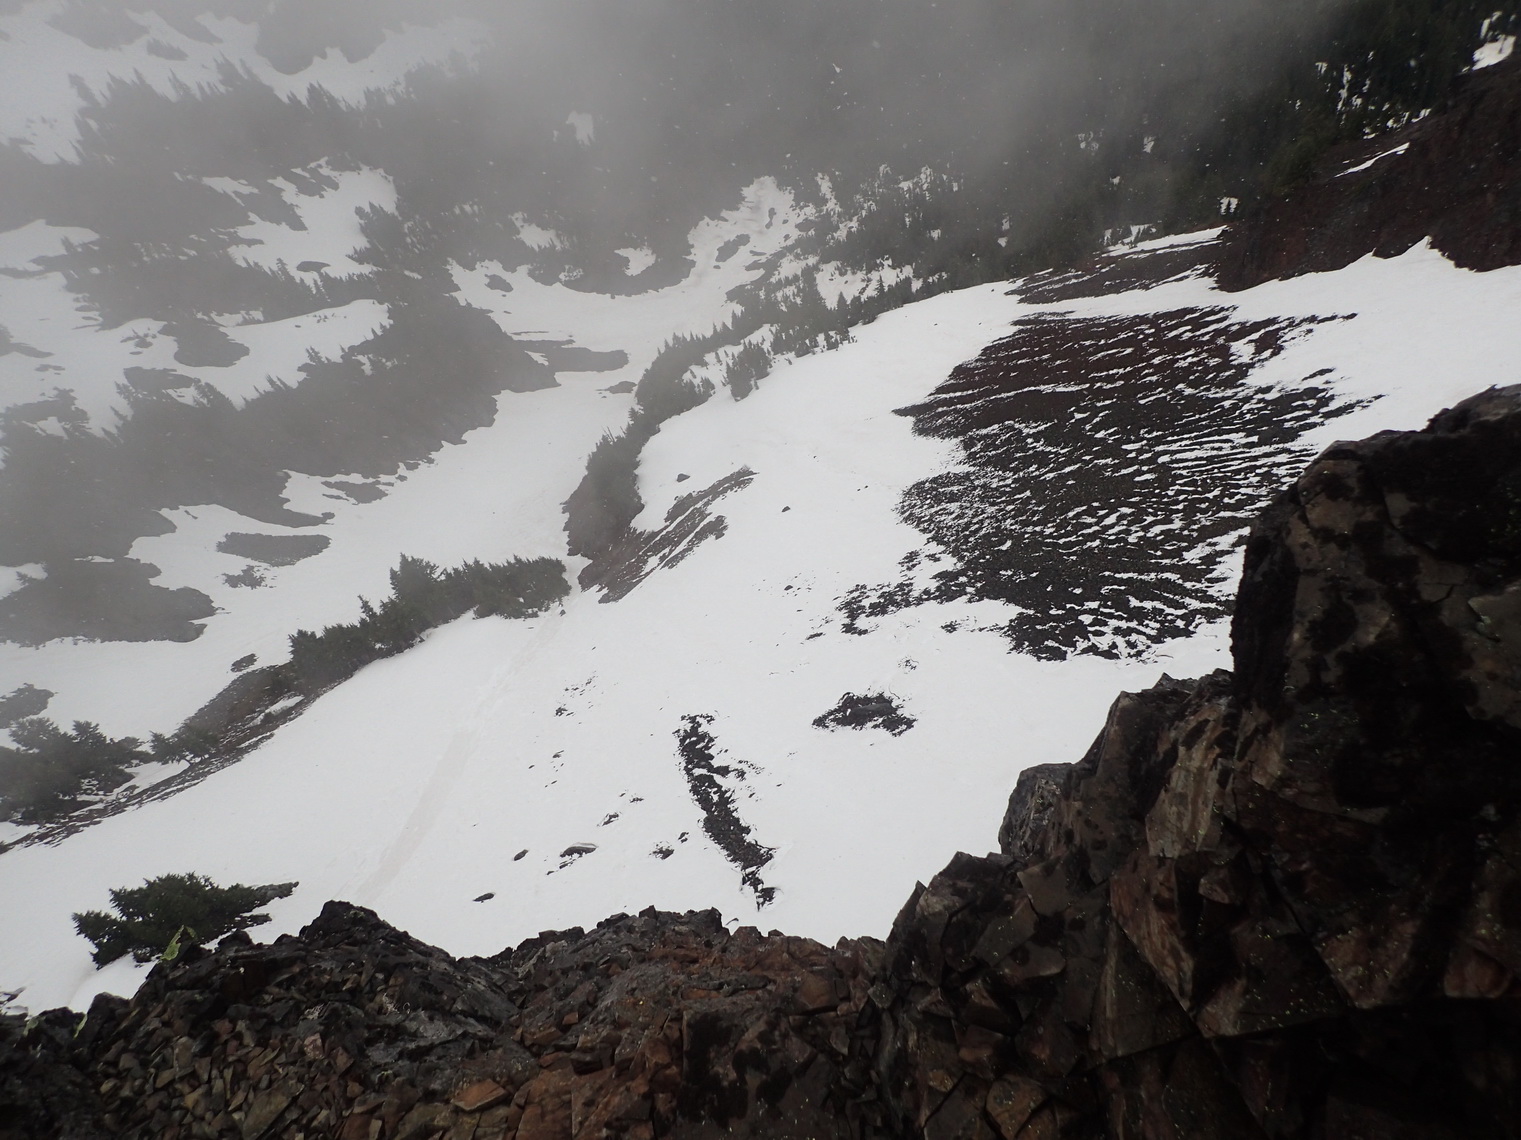
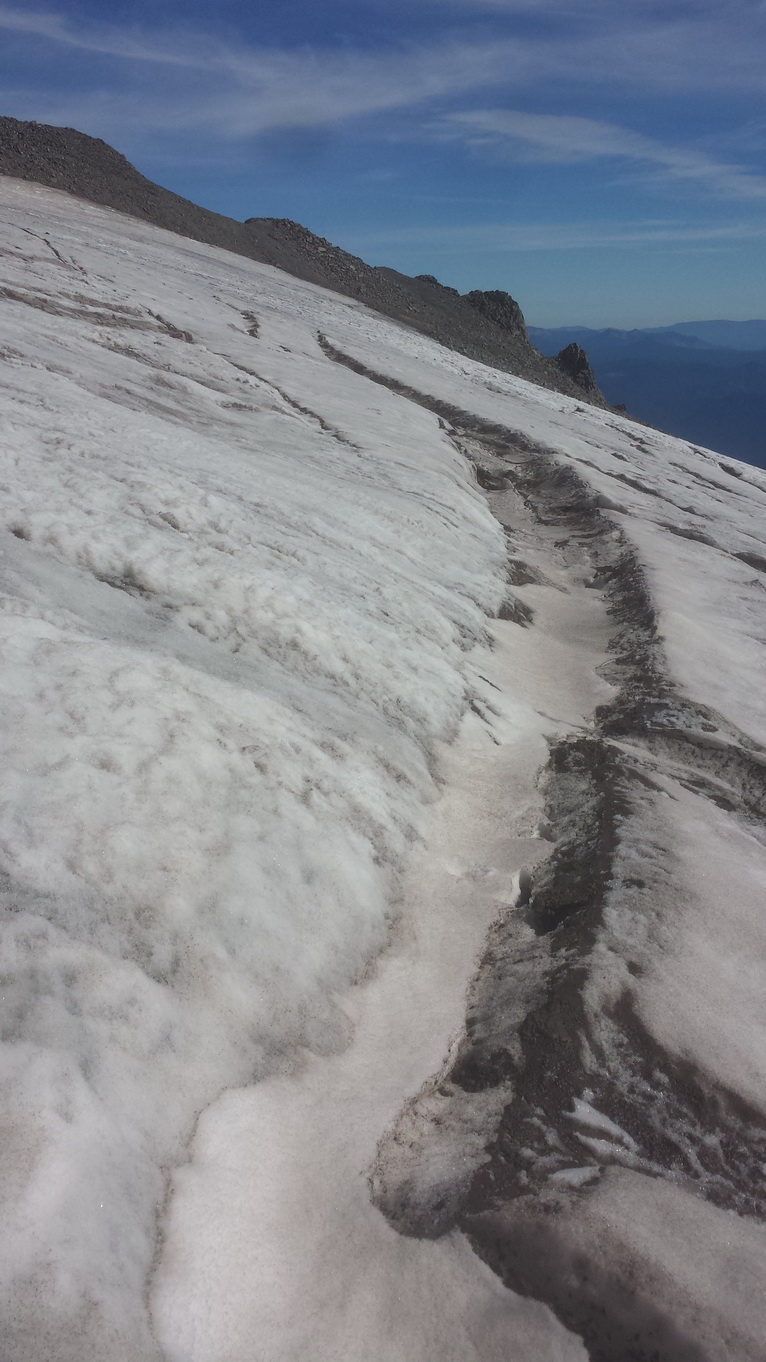
To get from 9,000 to 10,000 feet, where Camp Muir is located, took me about 1.5 hours. It’s probably barely more than half a mile, but this is where the crevasses started. First, there were small, narrow ones, and I could hear the water rushing down in them.

20151005_133826_resize

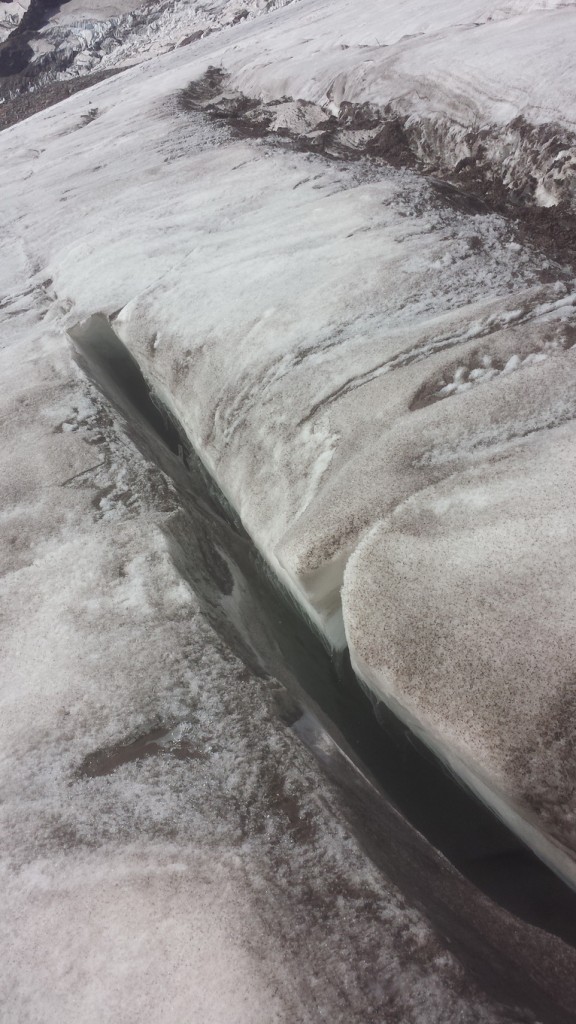
But soon enough, there were pretty big transverse crevasses that were several feet wide and stretched hundreds of feet to either side. I had to zigzag through them, to the left, then between two crevasses back to the right, then when the next crevasse ended, back to the left again. This is where I definitely wished my mountaineering girlfriend were there with a rope.

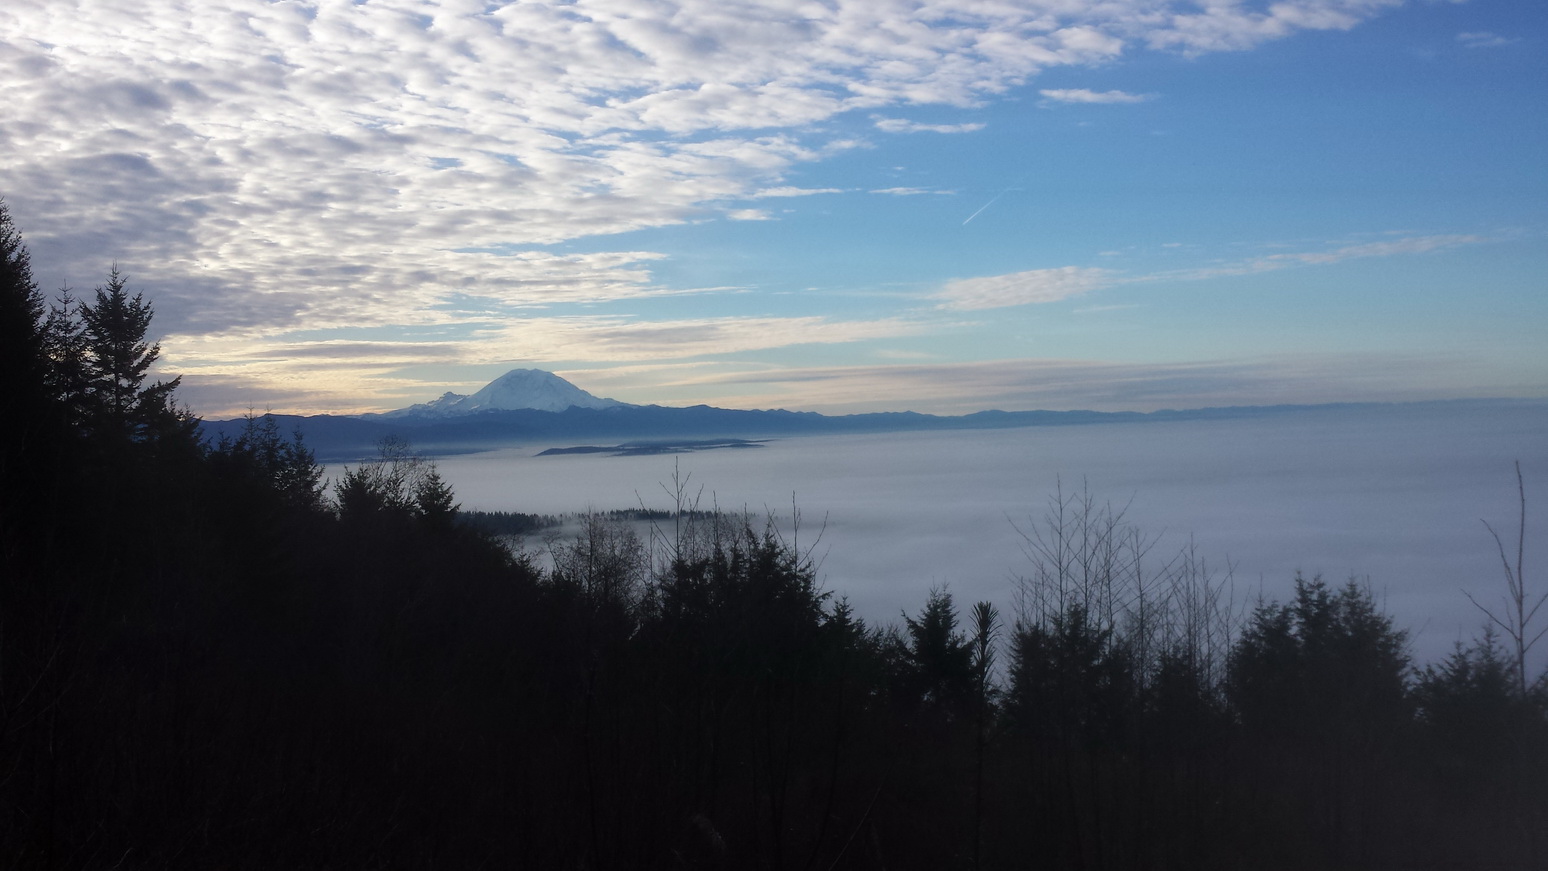
I may have made a mistake here. The snowfield was initially much nicer in the west, so I headed over that way. On my way down, in the east, there were fewer transverse crevasses.

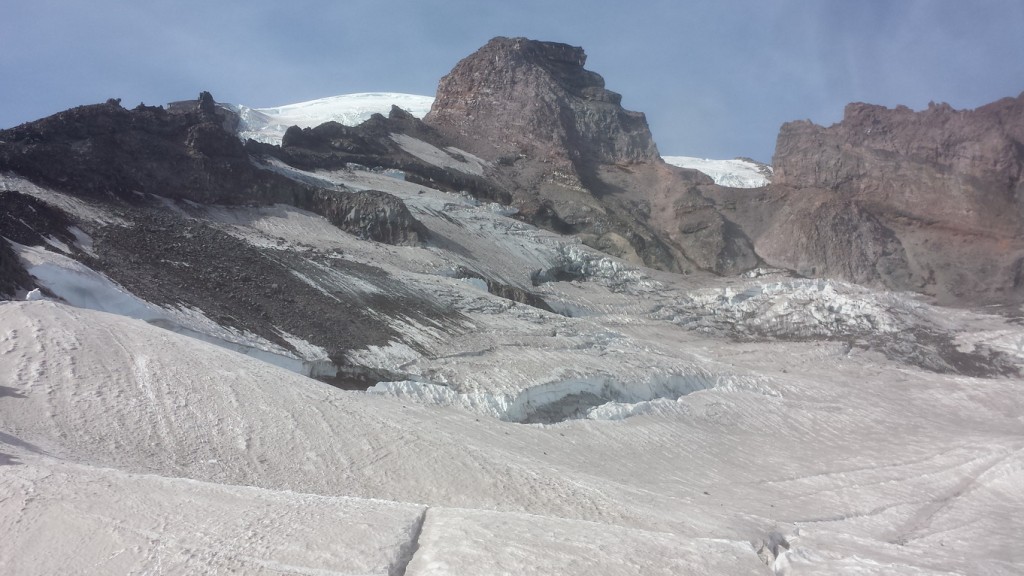
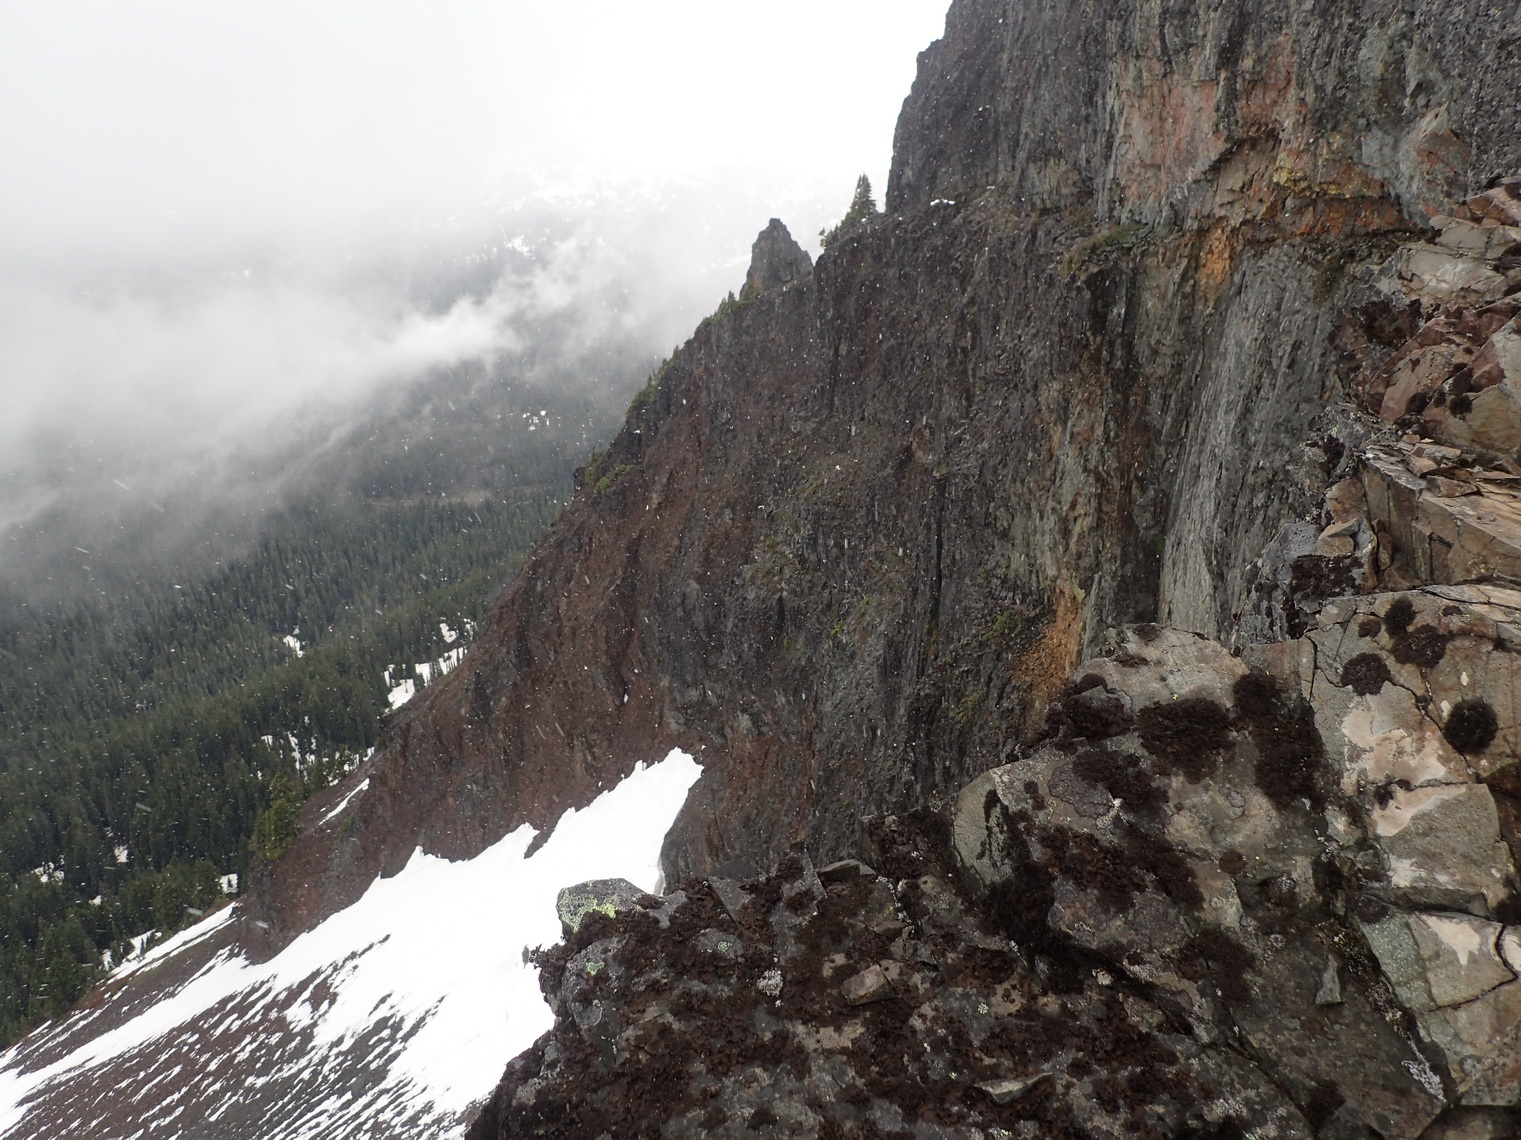
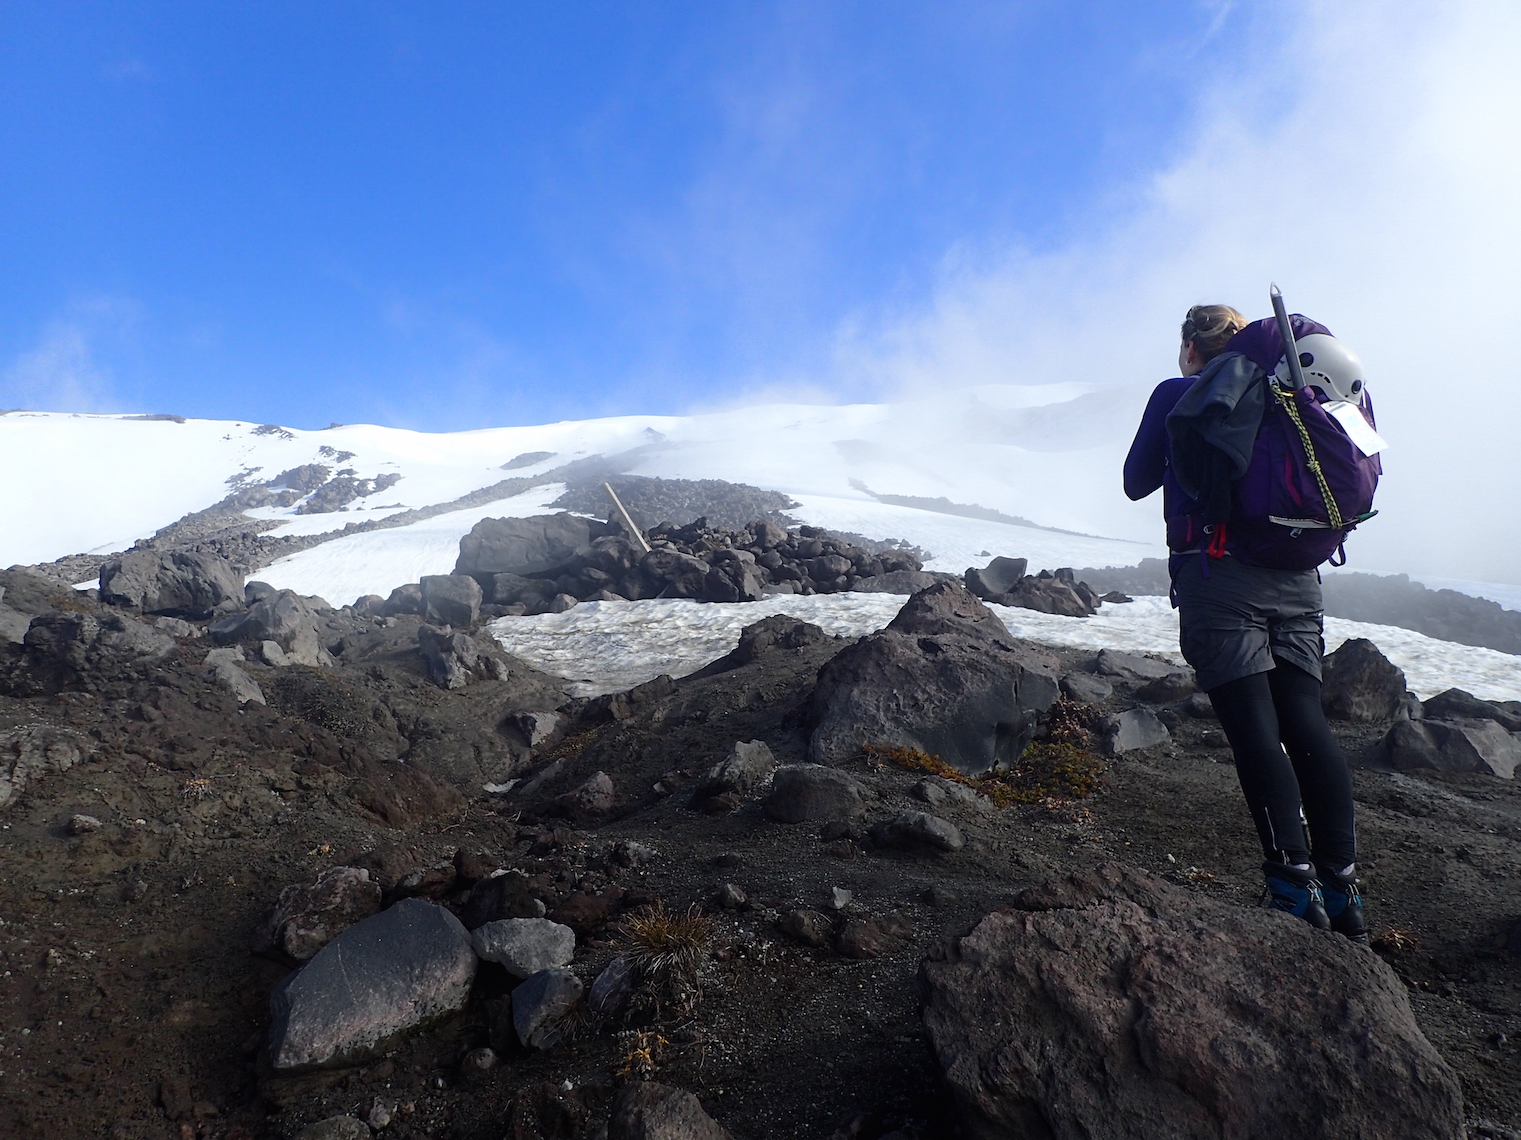
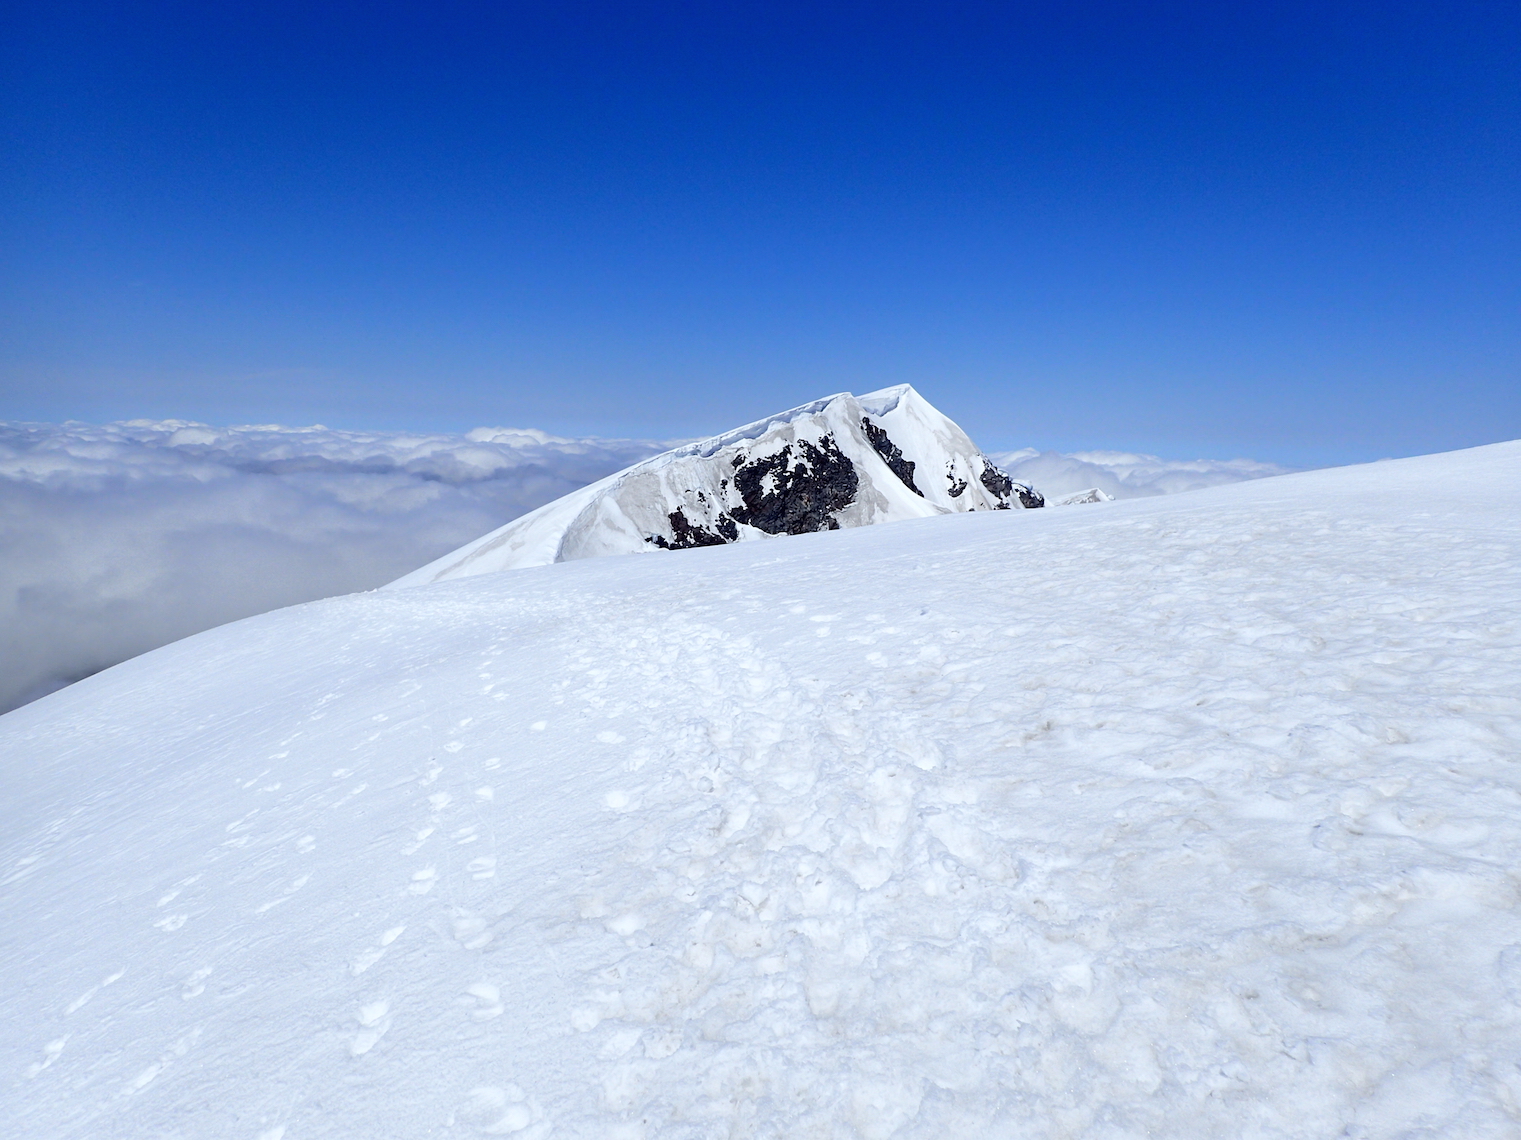
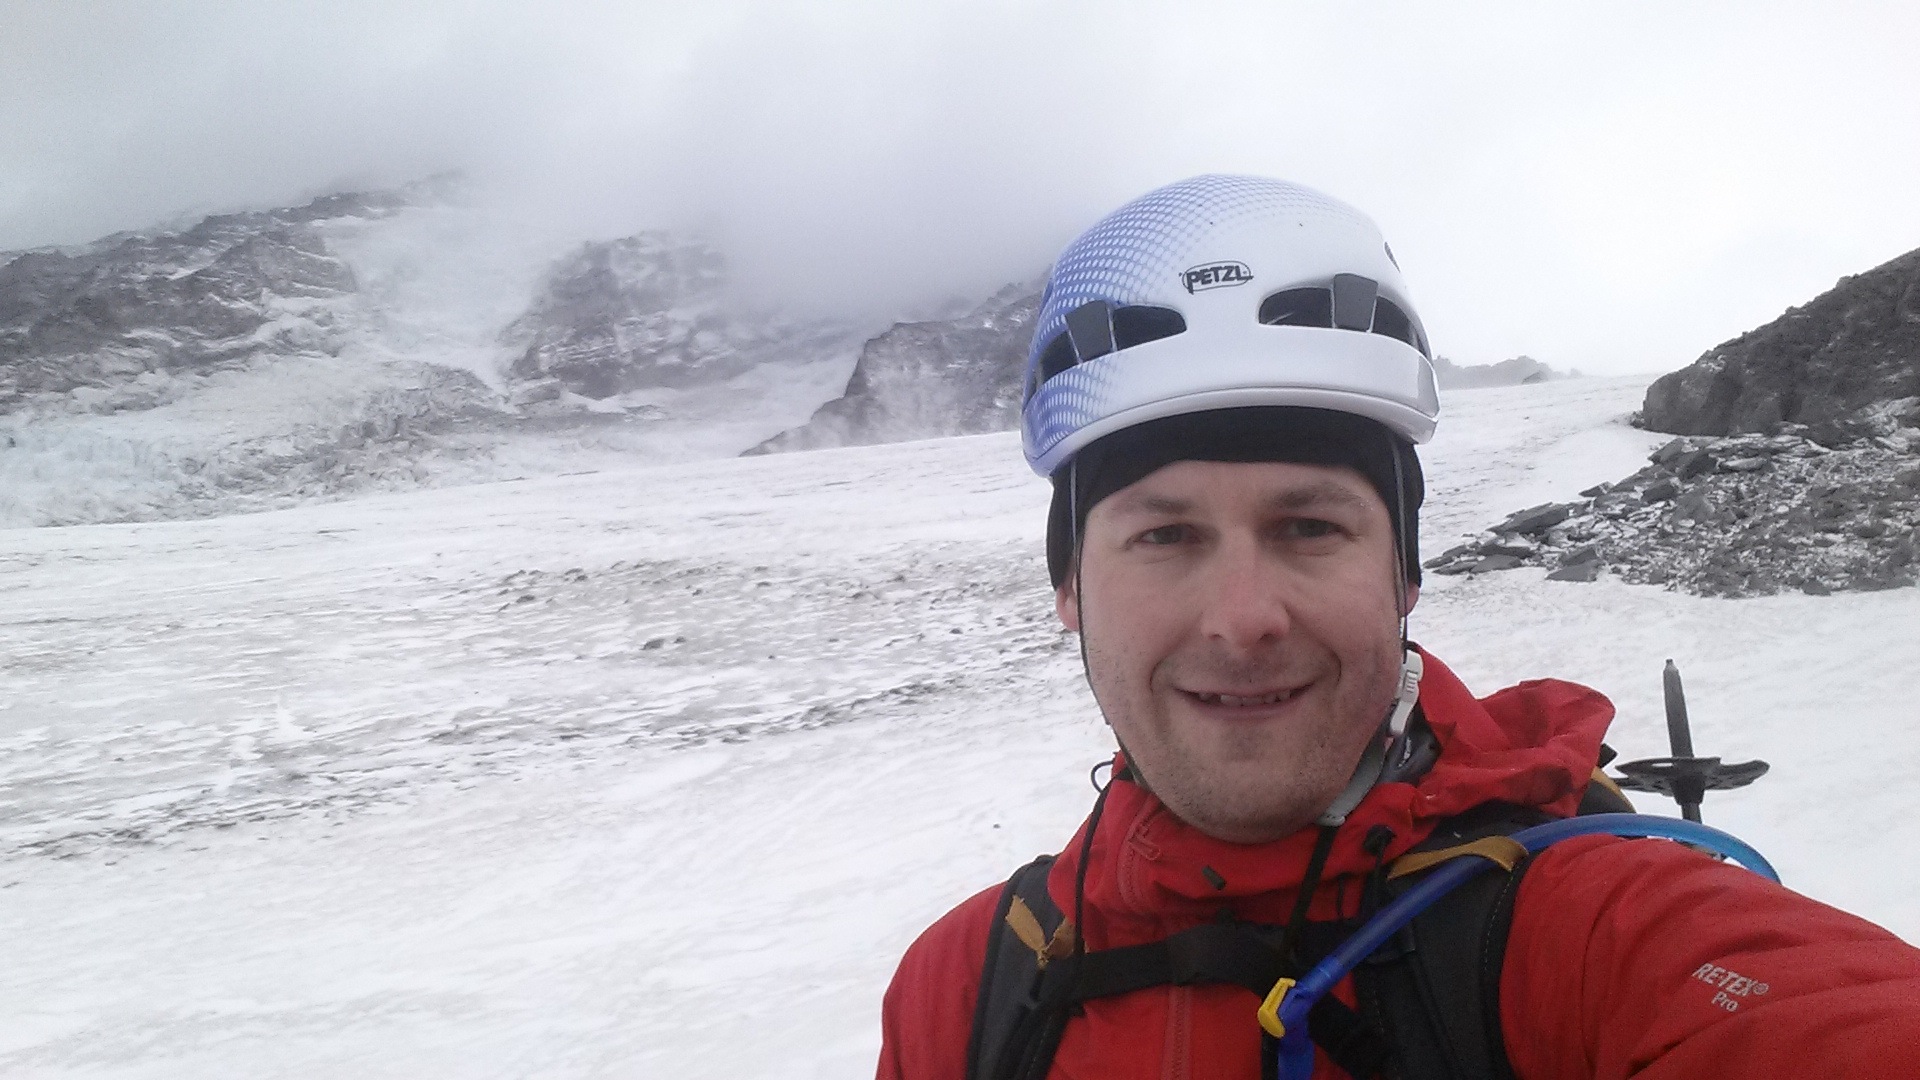
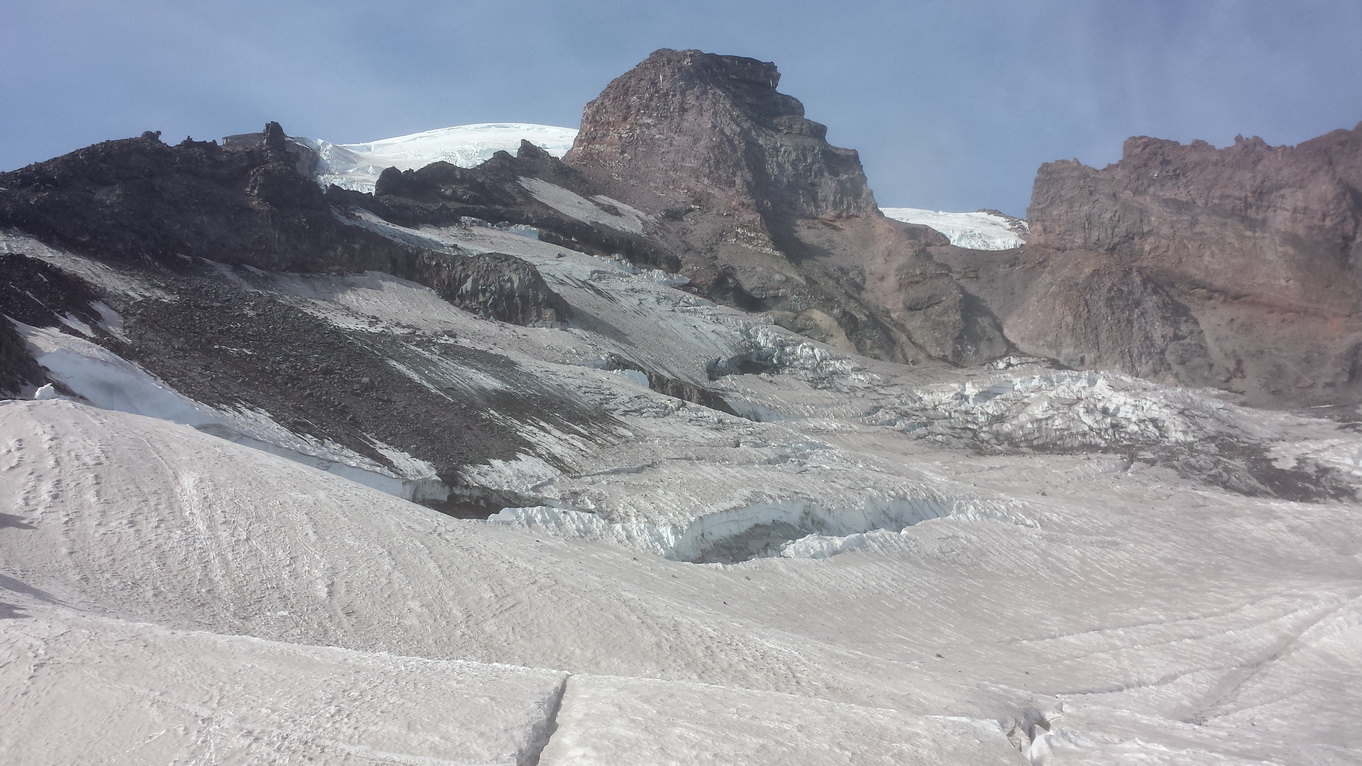
This big crevasse is at about 9,400 feet elevation, near the Anvil Rock.

20151005_134051_resize

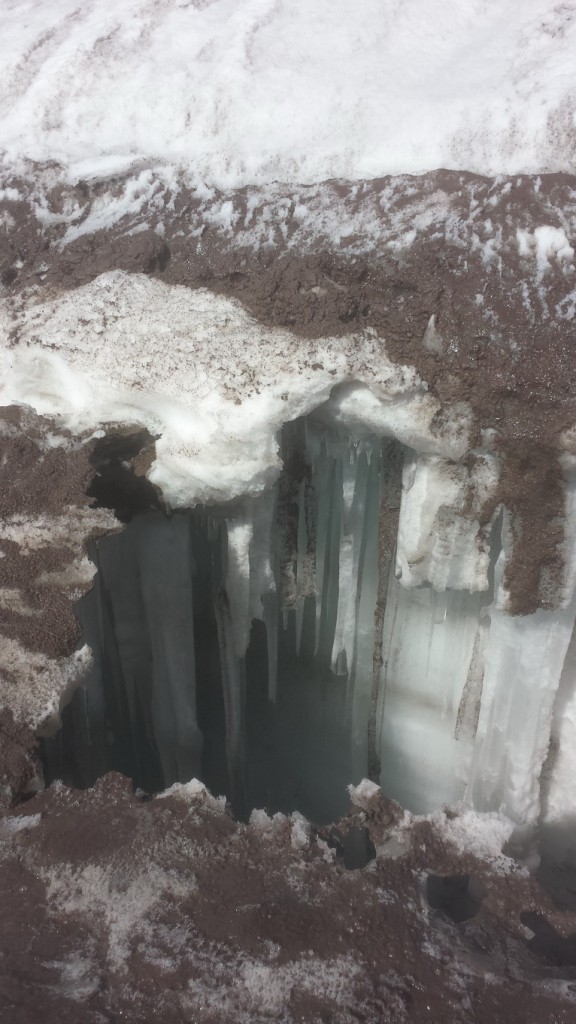
A lot of the crevasses were snow-covered, but after my boot went through a snow bridge once, I decided to not cross them anymore. Look how long they are!

20151005_134402_resize

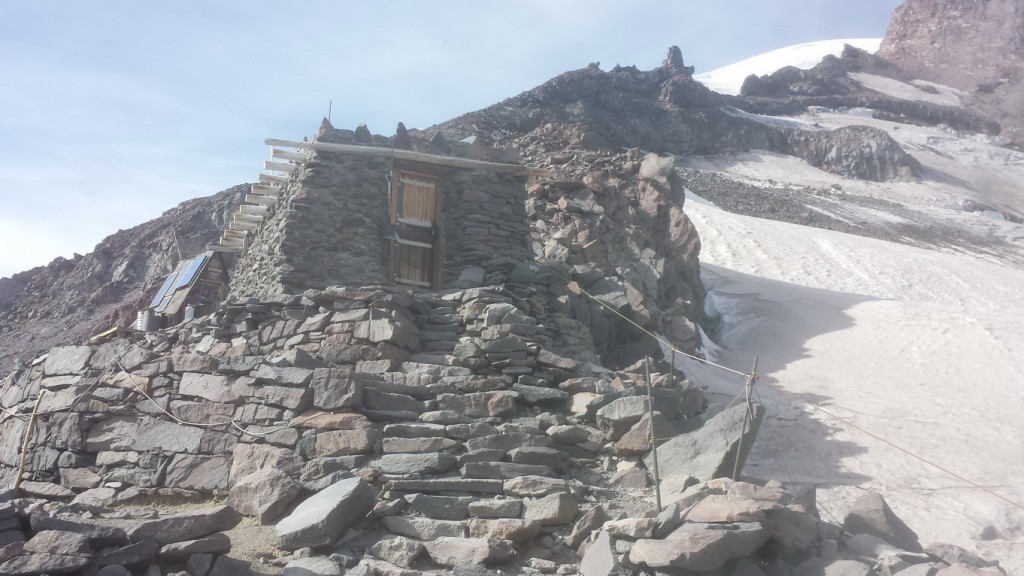
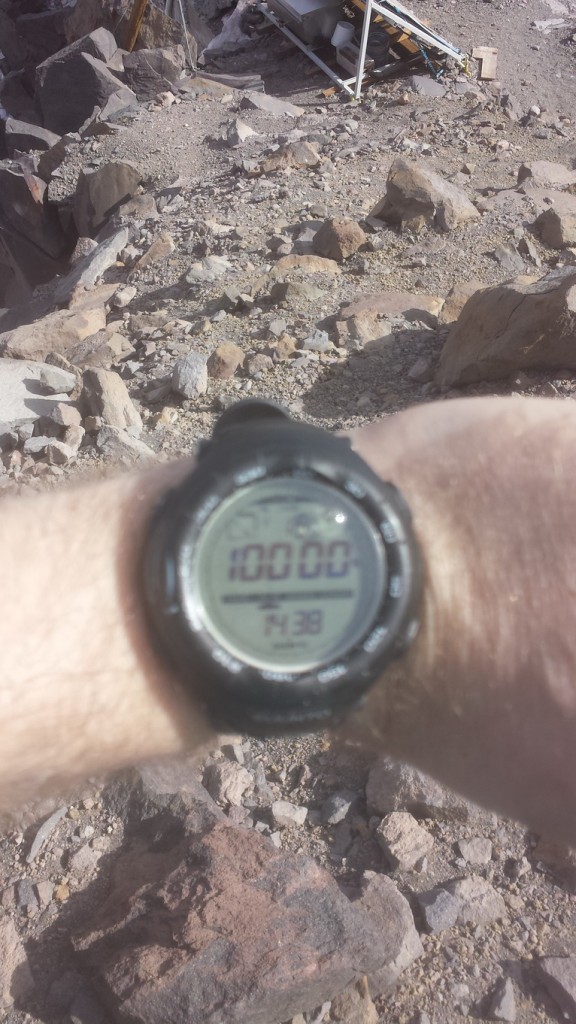
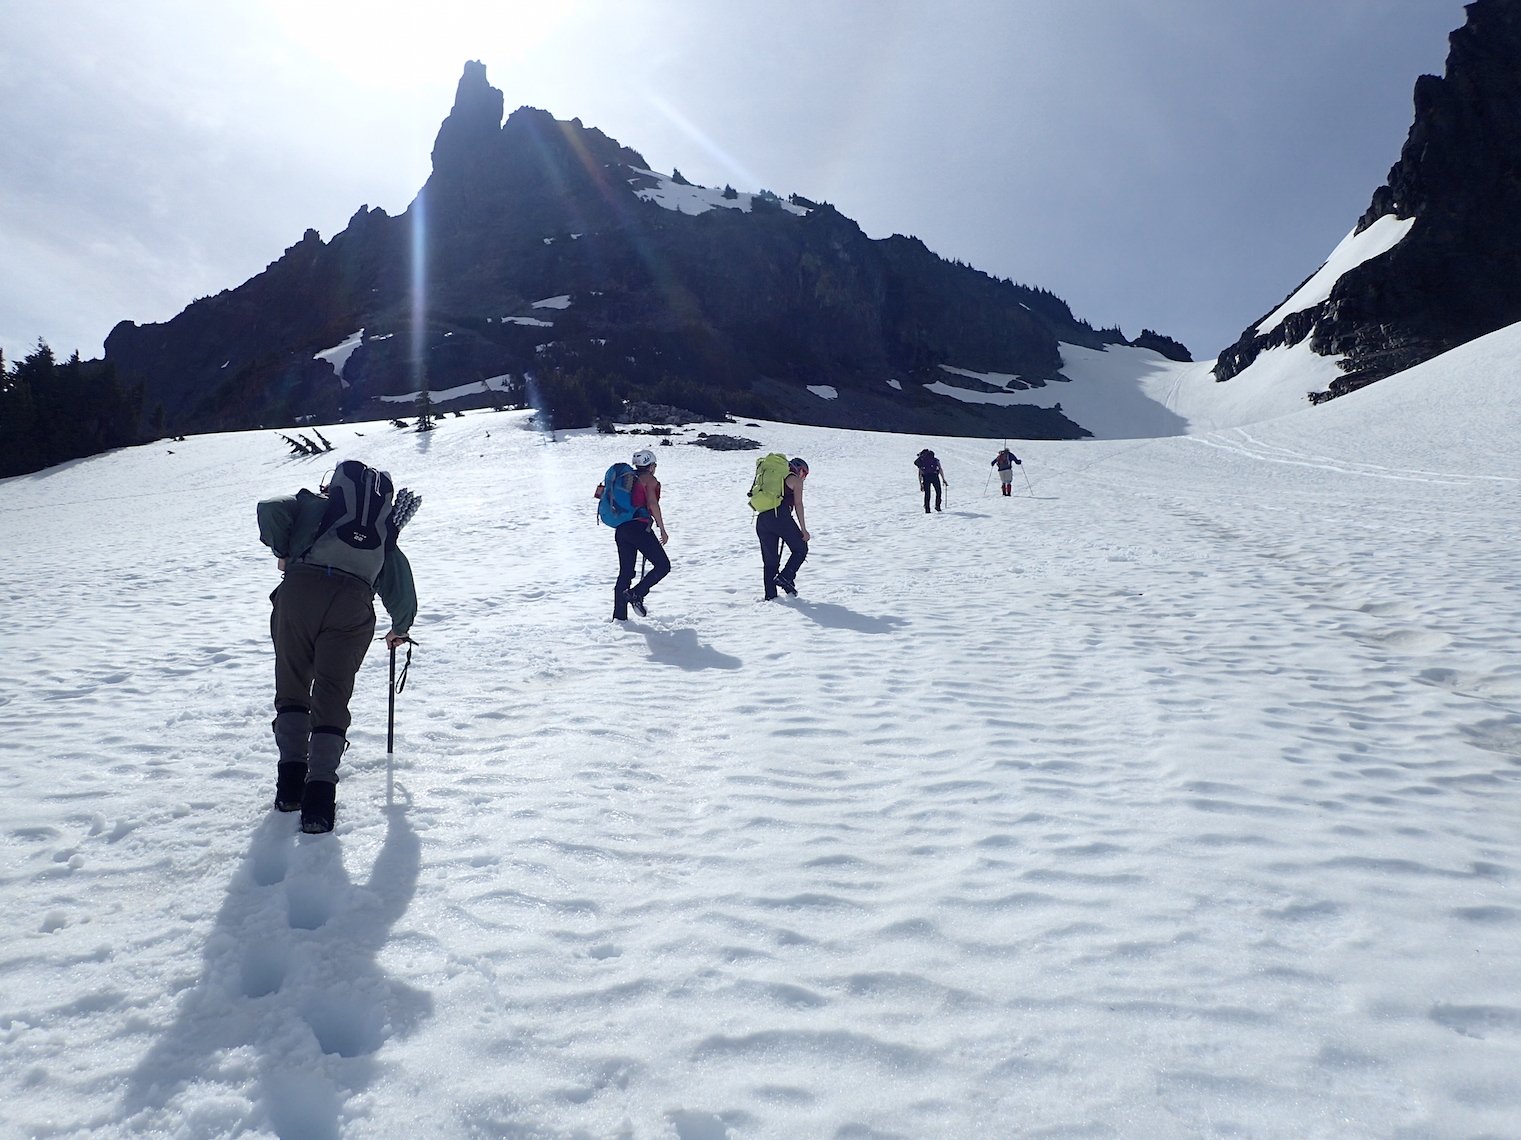
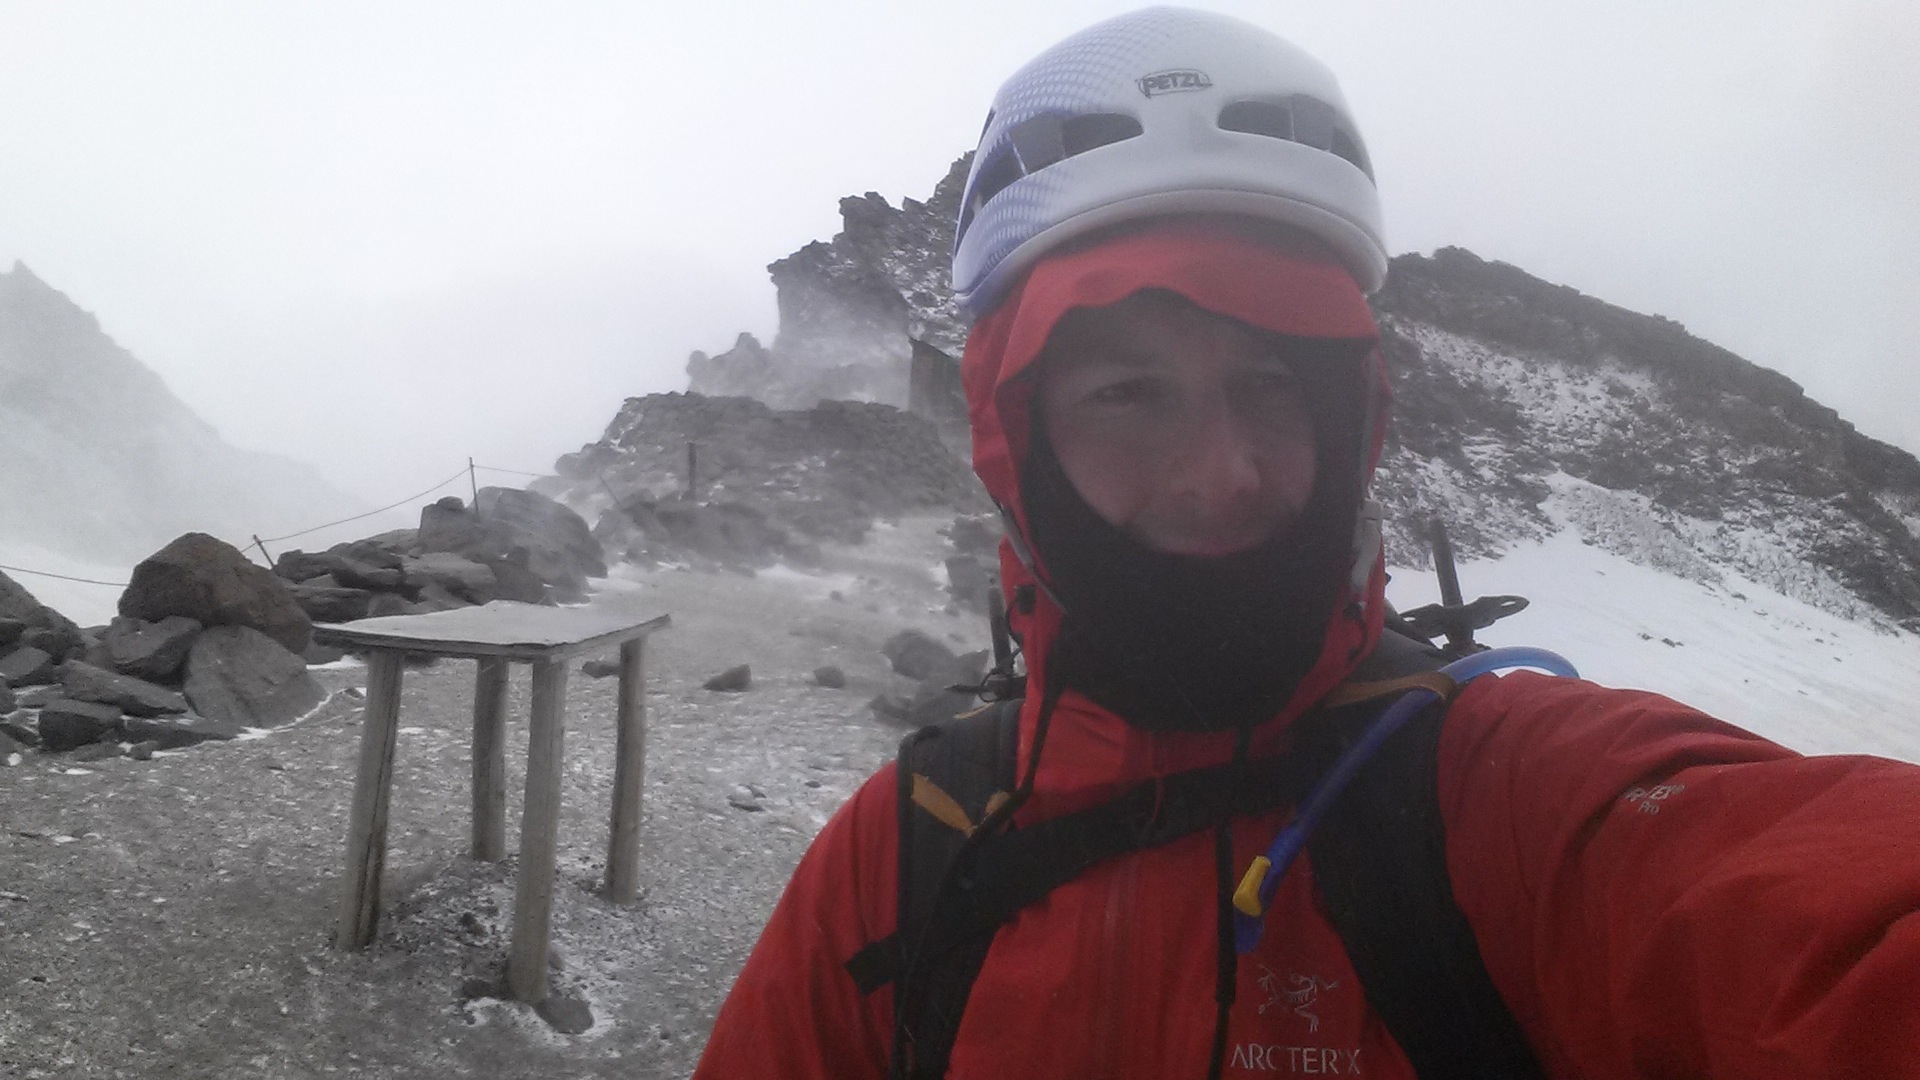
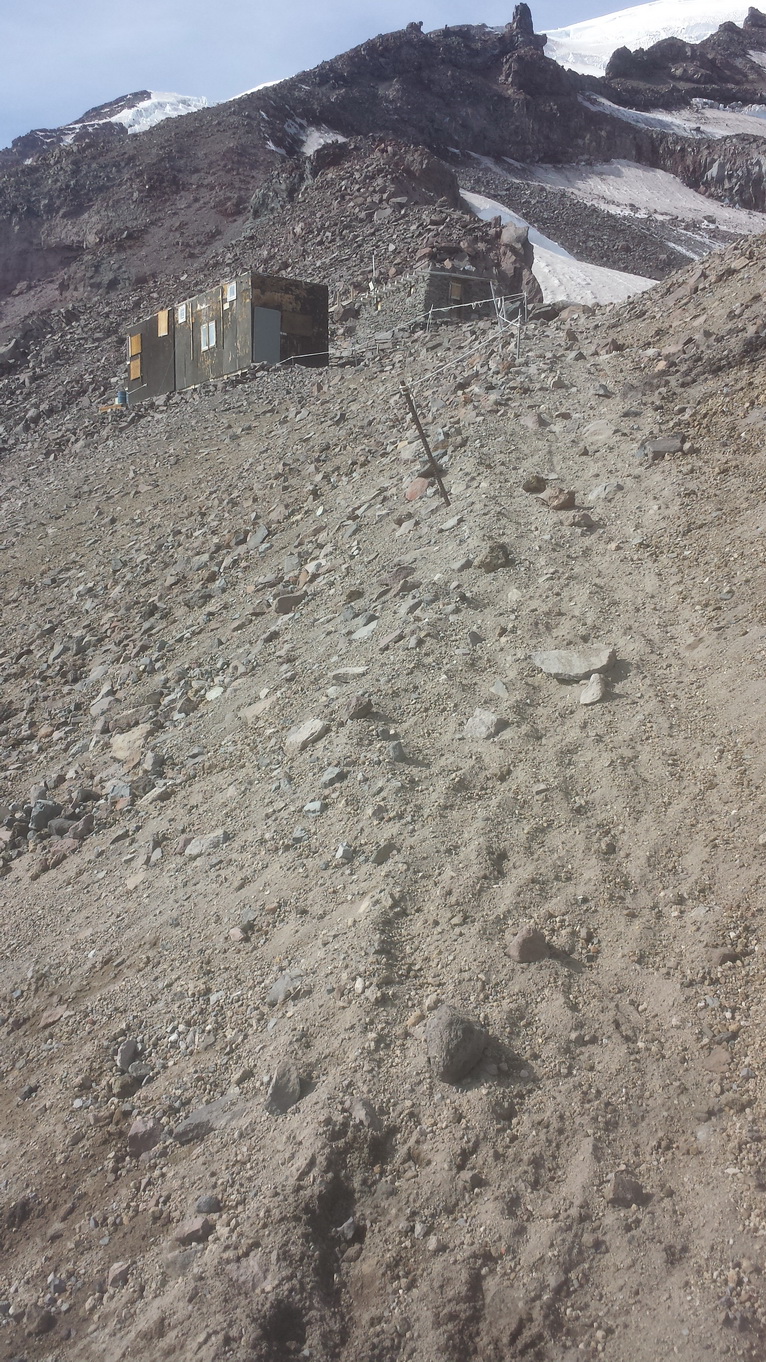
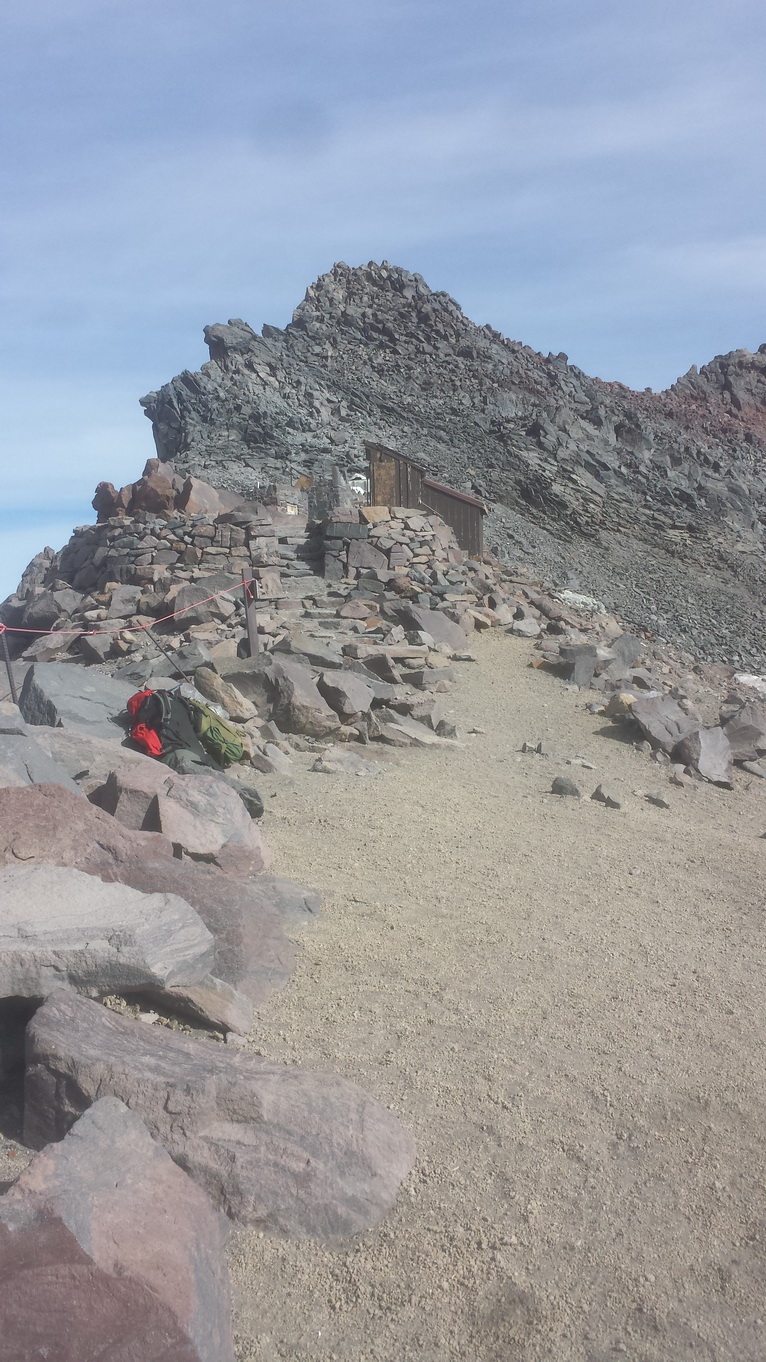
I reached Camp Muir a little before 2:30 PM. I had chosen 3 PM as time to turn around, regardless of where I was. At Camp Muir, there are a few buildings, solar cells, toilets, and so on.

20151005_142230_resize

20151005_142436_resize

20151005_142442_resize

20151005_142758_resize

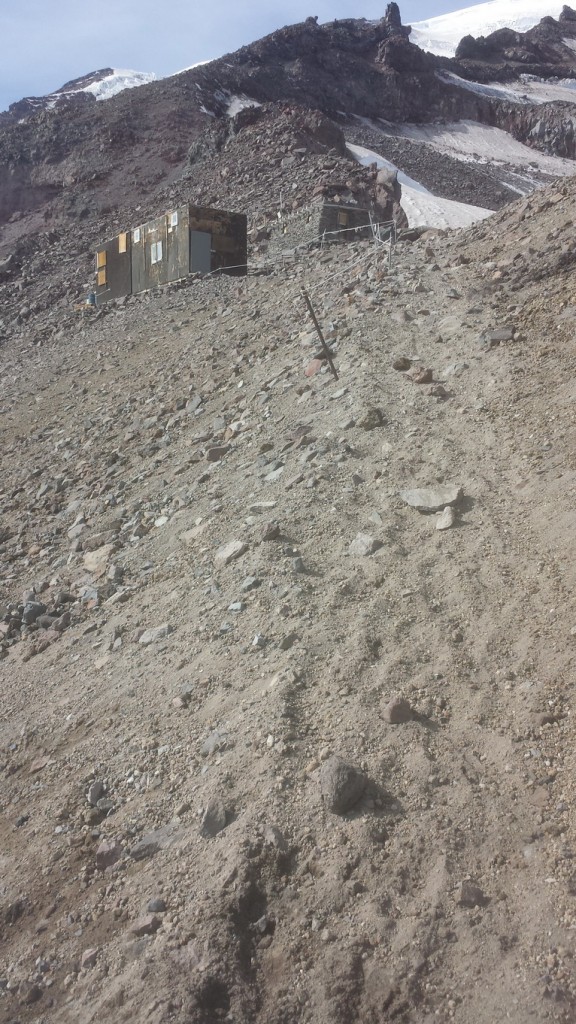
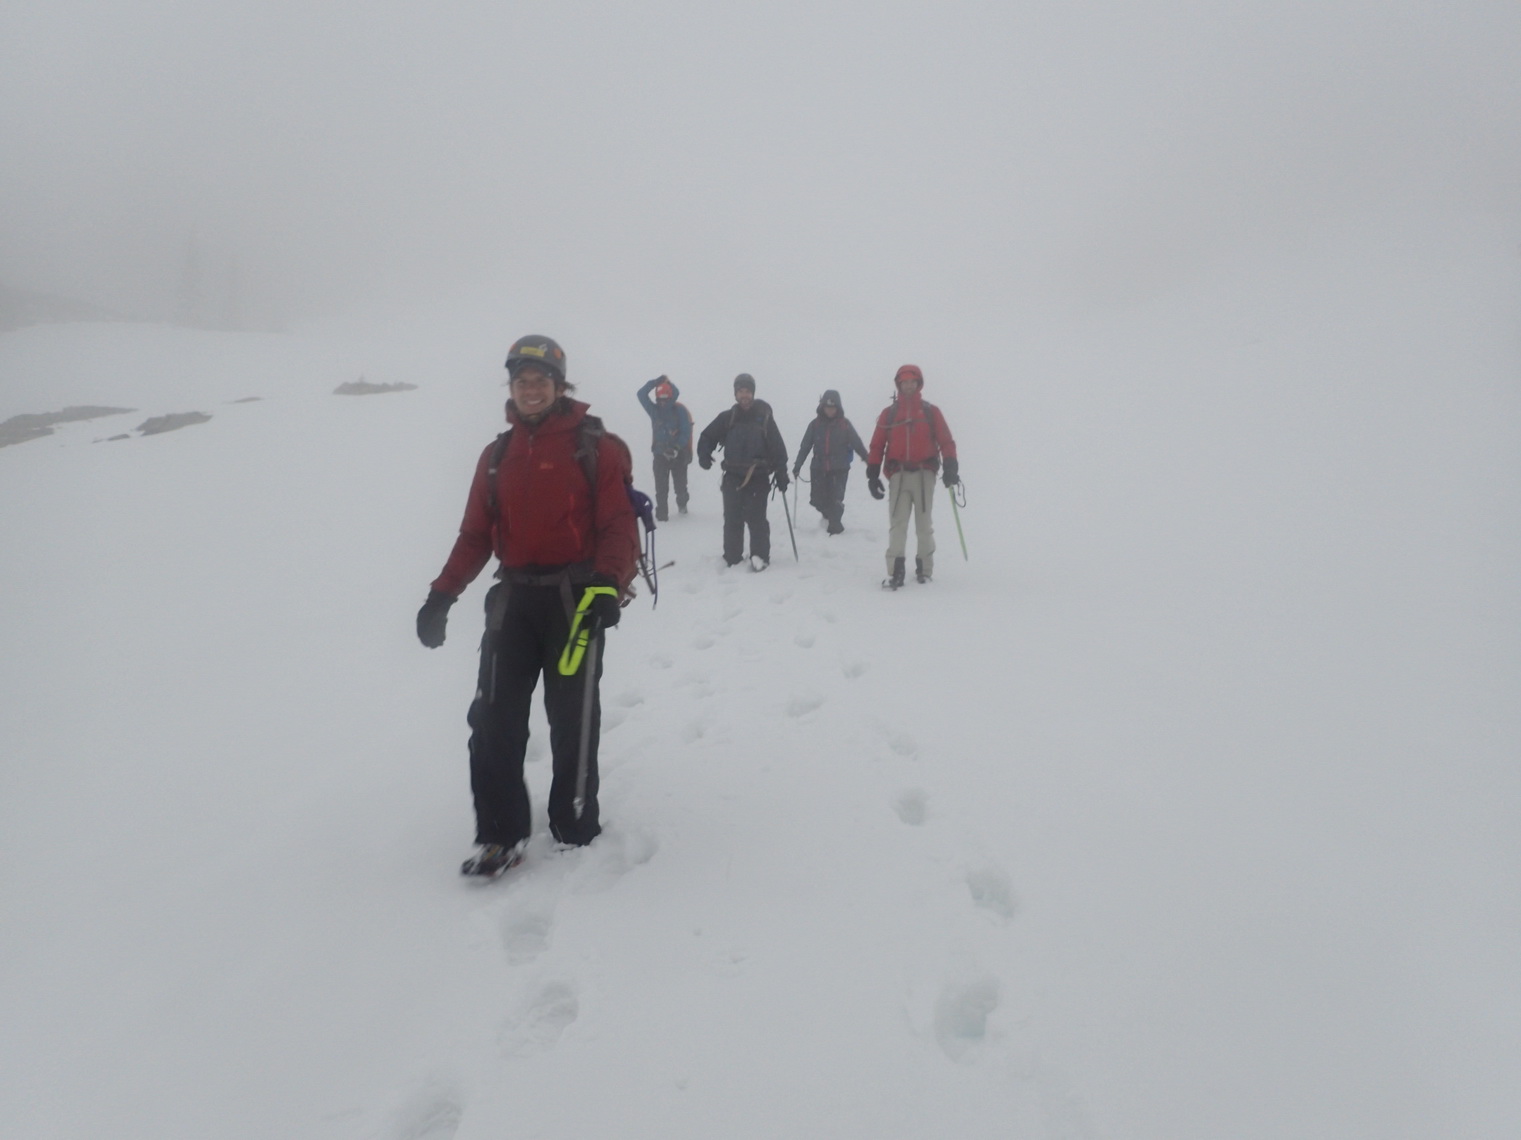
Four other climbers were there as well, on the north side of Camp Muir, doing some crevasse exercises. The area north of Camp Muir, towards the Cadaver Gap, the Cathedral Rocks, and Little Tahoma Peak, is quite dramatic. Giant crevasses!

20151005_142845_resize

20151005_142914_resize

At 10,000 feet, it was difficult to catch my breath, even when doing nothing. The air is so thin! It’s an unusual feeling because it’s so unexpected. I think at first I almost mistook it for thirst.

20151005_143749_resize

20151005_143837_resize

On the way down, I slipped one more time and had to be quick with the self-arrest, because I really started to slide down fast. I think my RMI guide would have been proud. And I fell on my butt once, but not because it was steep, just because it was slippery. The mountaineering course was definitely worth it.

I was back at the car at 6 PM, eight hours after I had left.

Share
Posted in Pictures | Leave a comment

Print This Post Print This Post  

Wanting a New Phone

My current phone, a Samsung Galaxy S4, is now almost 2 years old (just a week shy).

For the last six to nine month, battery life has been pretty horrible, and the USB connector also doesn’t work all the time anymore either. It’s definitely time for a new phone. But which one?

Here are things I like:

  • Android
  • Large battery
  • User-replaceable battery
  • User-replaceable SD card storage
  • Thin
  • Not too big (5″, perhaps even a bit less)
  • Water-proof would be nice

Unfortunately, here are the candidates:

  • The Samsung Galaxy S6 doesn’t have a replaceable battery or storage, and it’s not water-proof.
  • The Samsung Galaxy S6 Active is only on AT&T, and I’m not on AT&T and won’t be.
  • The LG G4 is really big. The battery is big, but with it’s big display, it probably won’t last longer than the S6 battery. But the battery is replaceable. The worst is the button placement — next to the camera? Who came up with that terrible idea?

Of course, I have never since my Palm Treo 755p replaced the battery. And I’ve never replaced the SD card I put in. But I do have a 64 GB card in there, plus 16 GB in the phone, and I’m using about 60 GB of the 80 GB. So for the Galaxy S6, I would have to go for the 128 GB model, and even that isn’t really future-proof.

CategorySamsung Galaxy S6LG G4
Battery2550 mAh, not replaceable (-)3000 mAh, replaceable (+)
Storage128 GB, not replaceable (-)32 GB + SD card (+)
Size5" (+)5.5" (-)
WaterproofNo (but lasts over 10 minutes)No (but supposedly lasts 2 hours)
UII know it, and I like it (+)Seemed shrill and gimmicky in the store
Button placementSides (+)Next to camera (-)
Sum2x (-) 3x (+) = +12x (-) 2x (+) = 0


So what am I going to do? I don’t know yet… But I think I’m leaning towards getting the 128 GB version of the Galaxy S6, even if the battery and storage aren’t replaceable.

Share
Posted in Uncategorized | Leave a comment

Print This Post Print This Post  

Lake 22 Hike

On the first Sunday of April, we came back to the Mountain Loop Highway to get to Lake 22. It was only a few miles away from Mt. Pilchuck, but there was almost no snow. We were definitely overdressed. Granted, the Mt. Pilchuck hike started at around the same elevation as where Lake 22 is situated.

The waters of Lake 22 were absolutely still, so still, in fact, that pictures with the reflection in it look… wrong, somehow. And the steep cliff walls surrounding the lake made us feel very small.

20150405_104258_resize_resize

20150405_111000_resize_resize

20150405_111106_resize

20150405_113800_resize_resize

20150405_114610_resize_resize

Share
Posted in Pictures | Leave a comment

Print This Post Print This Post  

Mt. Pilchuck Hike

At the beginning of April, I had a hiking double-header on the Mountain Loop Highway. Saturday I went up Mt. Pilchuck. I was surprised how much snow there was: close to 2 ft!

It was gorgeous and a good workout. Unfortunately, there were no good views from up at the fire lookout.

20150404_100637_resize_resize

20150404_100625_resize_resize

20150404_095516_resize_resize

20150404_095505_resize_resize

20150404_111756_resize_resize

Share
Posted in Pictures | 1 Comment

Print This Post Print This Post  

Life will find a way

Life will find a way.

Life will find a way.

Share
Posted in Pictures | Leave a comment

Print This Post Print This Post  

Hikes of Early 2015

The first hike was the 3.8 mile Poo Poo Point Chirico Trail, with 1760 ft of gain. This was also the first new trail for me since the end of 2013.

On the way up Tiger Mountain.

On the way up Tiger Mountain.

The other hike was another visit to Annette Lake, with 1400 ft gain over the 7.5 miles round-trip.

Fog over Humpback Creek.

Fog over Humpback Creek.

Peaks above Annette Lake.

Peaks above Annette Lake.

I’m thrilled that I’ve been on two hikes already, and it’s still February. They weren’t hard, long hikes, but I was outside for a few hours on the trail. This is after sometimes last year I couldn’t really walk at all without being in pain. There’s a wonderful person who’s dragging me outside.

Share
Posted in Pictures, Uncategorized | Leave a comment

Print This Post Print This Post  

Sunglasses in the Snow

One of the most annoying things from my hikes early this year was going back and forth between the glare of the snow and the darkness of the woods. I kept taking off my sunglasses and putting them back on, sometimes once a minute. I decided I needed photochromic polarized sunglasses, and when REI had a sale, I snatched up a couple of Smith Backdrop models. One has amber lenses, the other has rose-colored lenses.

I went out to Alpental to figure out which ones I like better, but it’s really hard to decide. I think I like the rose-colored ones a tad bit better, but the amber ones glasses look better on me. I think I’ll keep them both and report more later.

At Alpental with Smith Backdrop polarchromic sunglasses with rose-colored Ignitor lenses.

At Alpental with Smith Backdrop polarchromic sunglasses with rose-colored Ignitor lenses.

Share
Posted in Pictures | Leave a comment

Print This Post Print This Post  

Getting My Perforce Back

About a week ago, I received an email from a user of Concutest, asking whether I would update it to be based on JUnit 4.12 soon. I hadn’t worked on Concutest in a while, and I also hadn’t followed along with the development of JUnit, so I don’t really know what changed from 4.7 to 4.12, but I’m happy that someone is using the results of my graduate work. I said I would work on a release last weekend.

Well, making a release turned out to be a bit more involved. I hadn’t really set up my current computer as a developer machine since my last machine died in November 2012.

The first thing I had to do was get my Perforce server up and running again. I had a backup of the Perforce server directory (which I had already migrated from Linux to Windows after grad school, after migrating it from Windows to Linux during grad school).

I tried to use the Perforce recovery instructions. But when starting up the server again, I got an error message:

Perforce server error:
Database open error on db.config!
BTree db.config from an older server version – 2013.2 or earlier

So I did a database upgrade using Perforce’s instructions for that, and I was back in business.

Now I’m working on merging in the concJUnit changes into JUnit 4.12, but I’m also thinking about turning my Perforce repository into a Git repository. At work, I’ve been using Git for nearly two years now, and I generally like it so much better than Perforce. Sorry, Perforce, you’ve been great for the last 11.5 years.

Share
Posted in Concurrent Unit Testing | 1 Comment

Print This Post Print This Post